How Quys makes stuff
From Raw Bronze to Exquisite Hotshoe: Quys' Masterful Craft
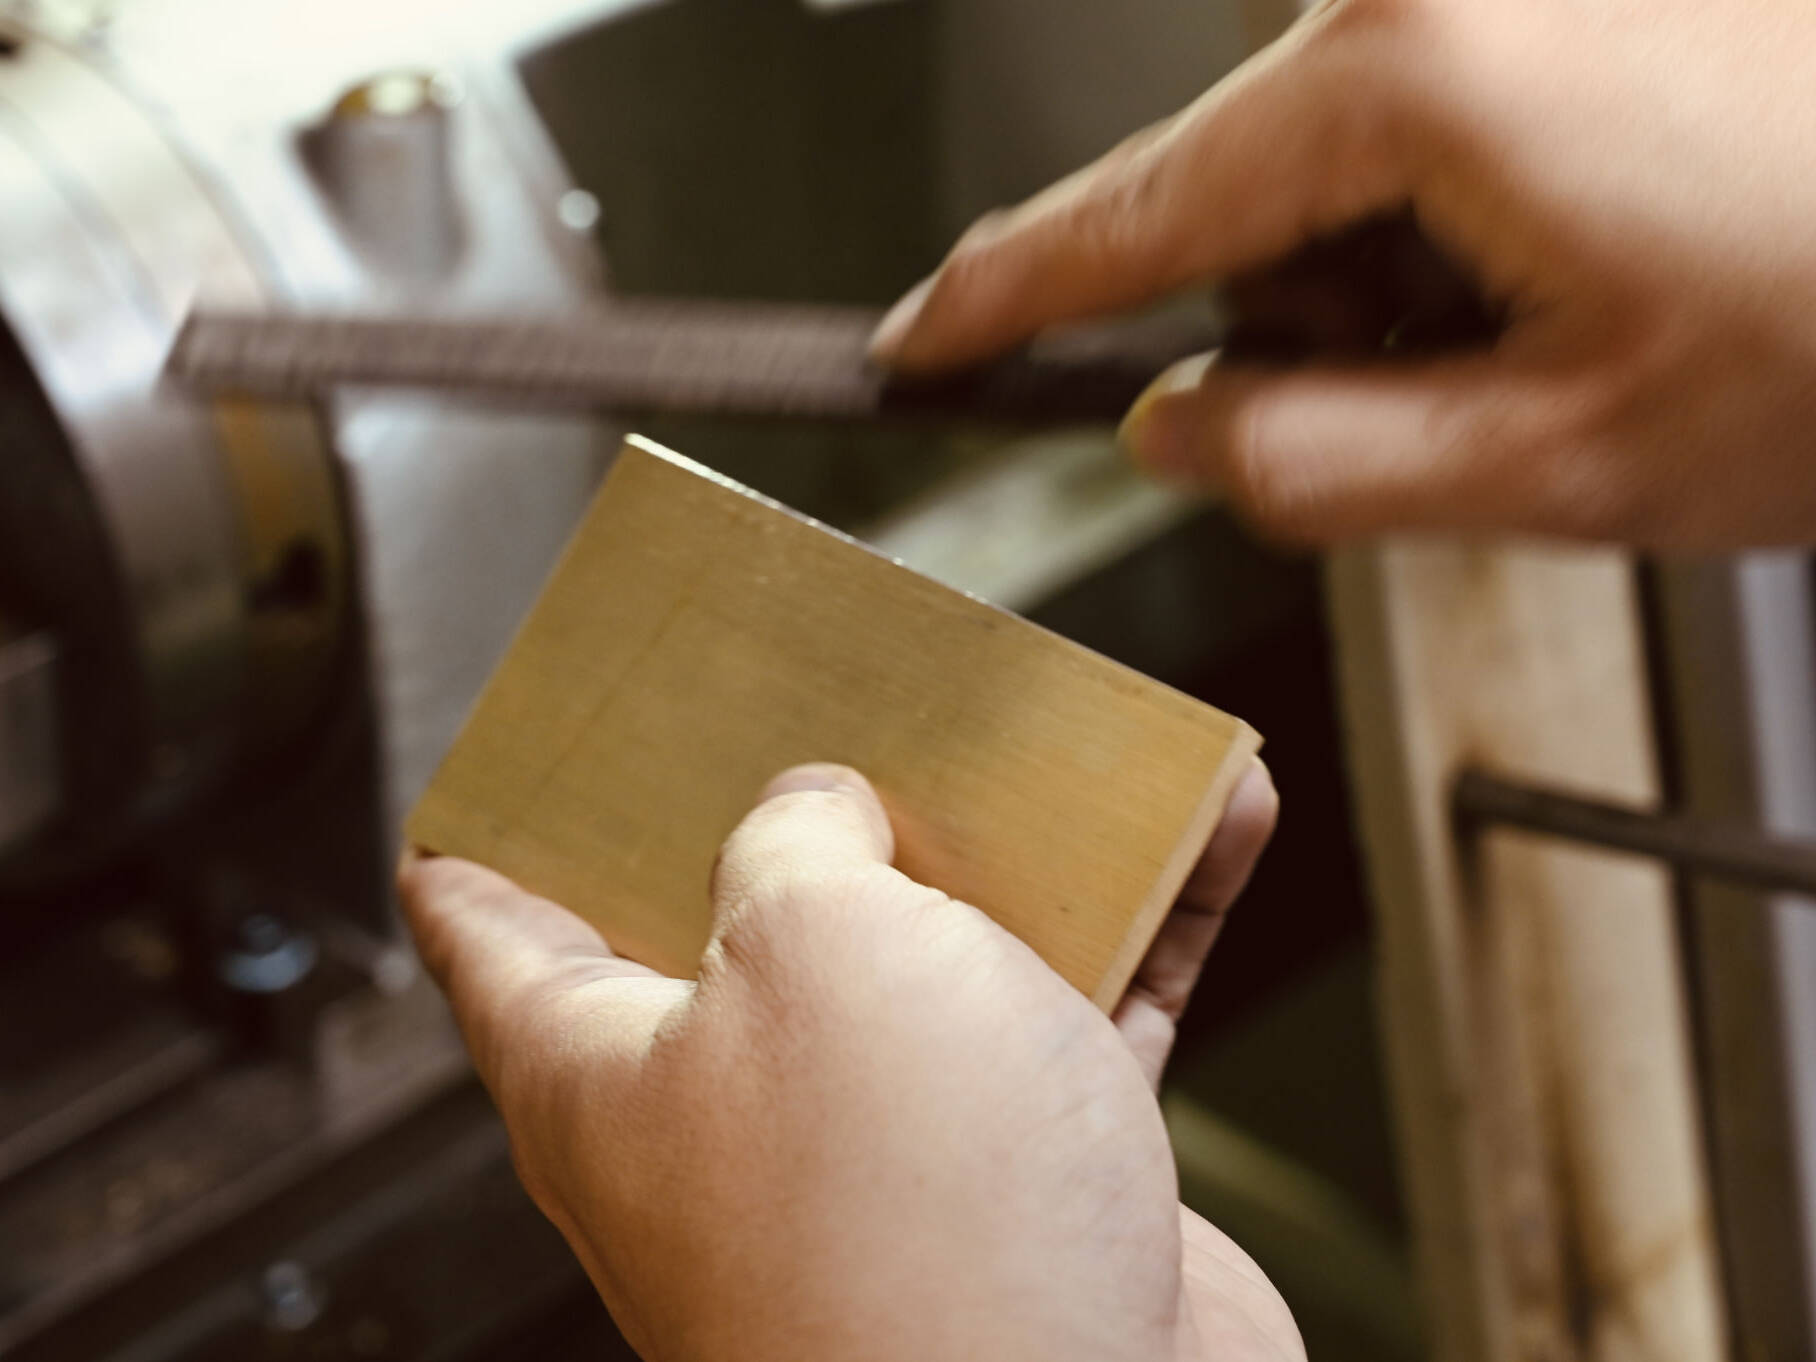
1. The Genesis of Perfection: Each hotshoe, a unique masterpiece, begins its journey as a meticulously selected block of raw bronze. Dimensions, thickness, every aspect is thoughtfully considered. Even the slightest imperfections are eradicated by hand, ensuring the bronze is primed for the precision of CNC machining.
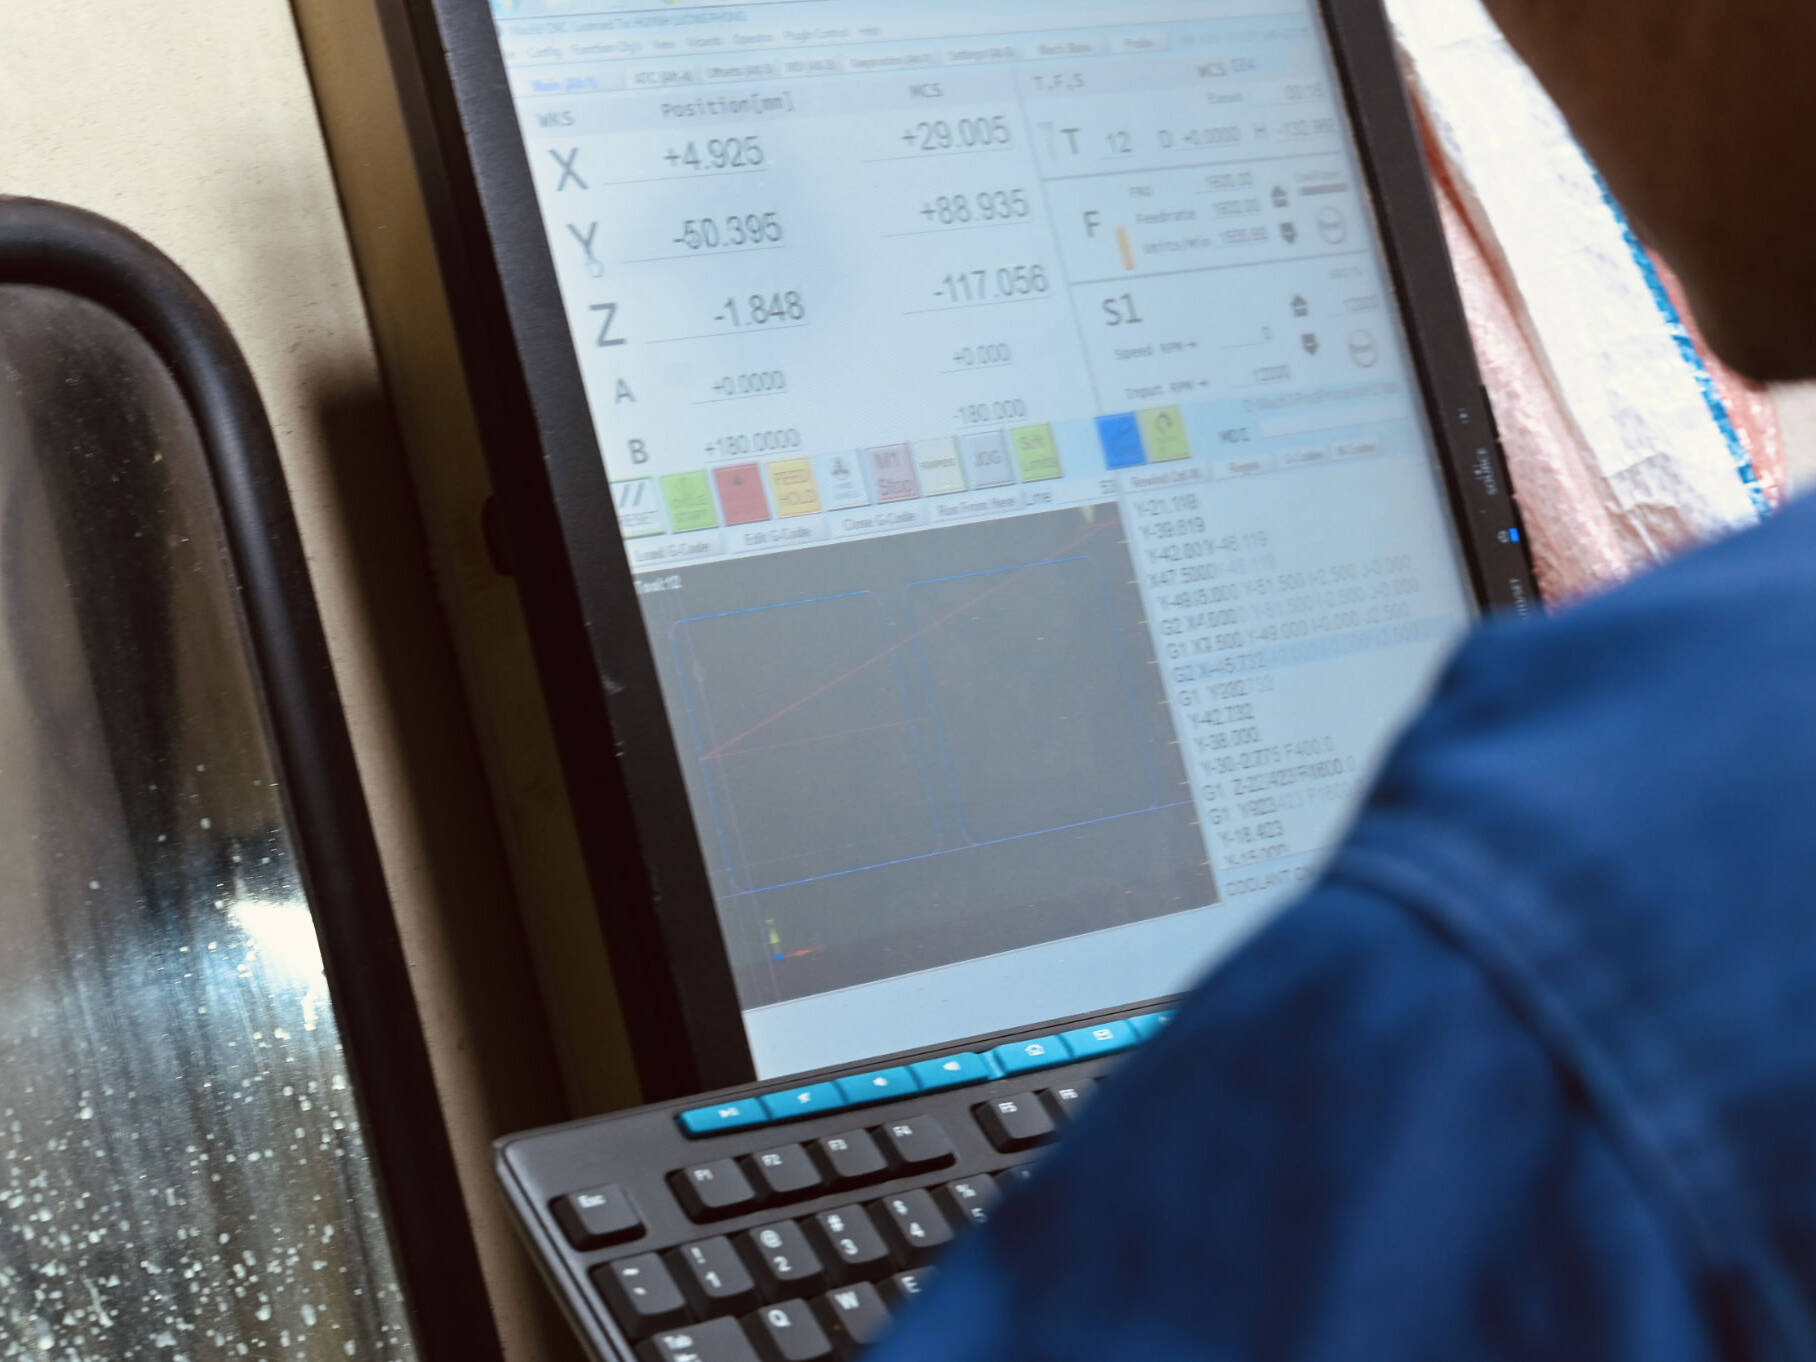
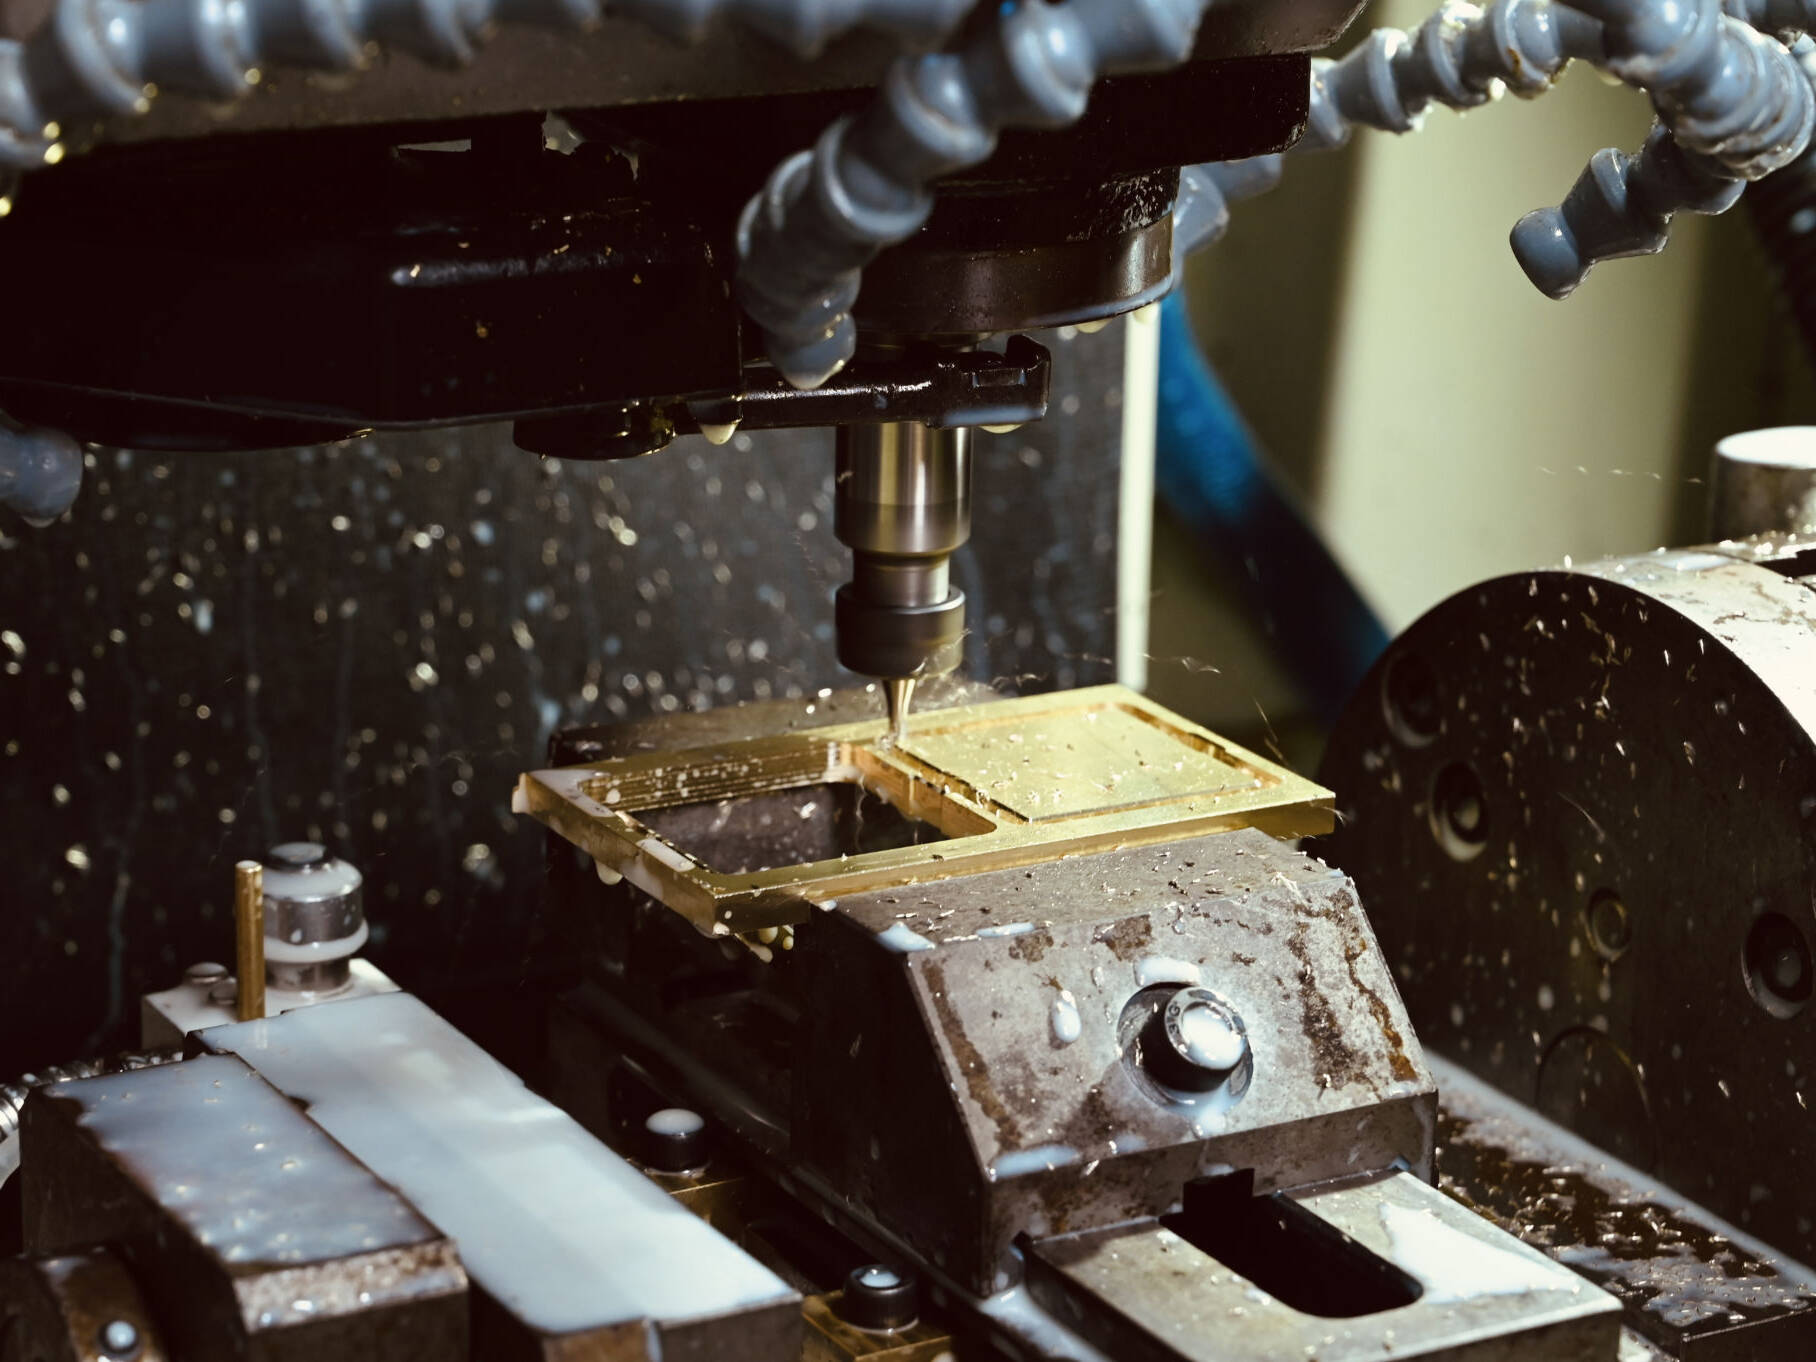
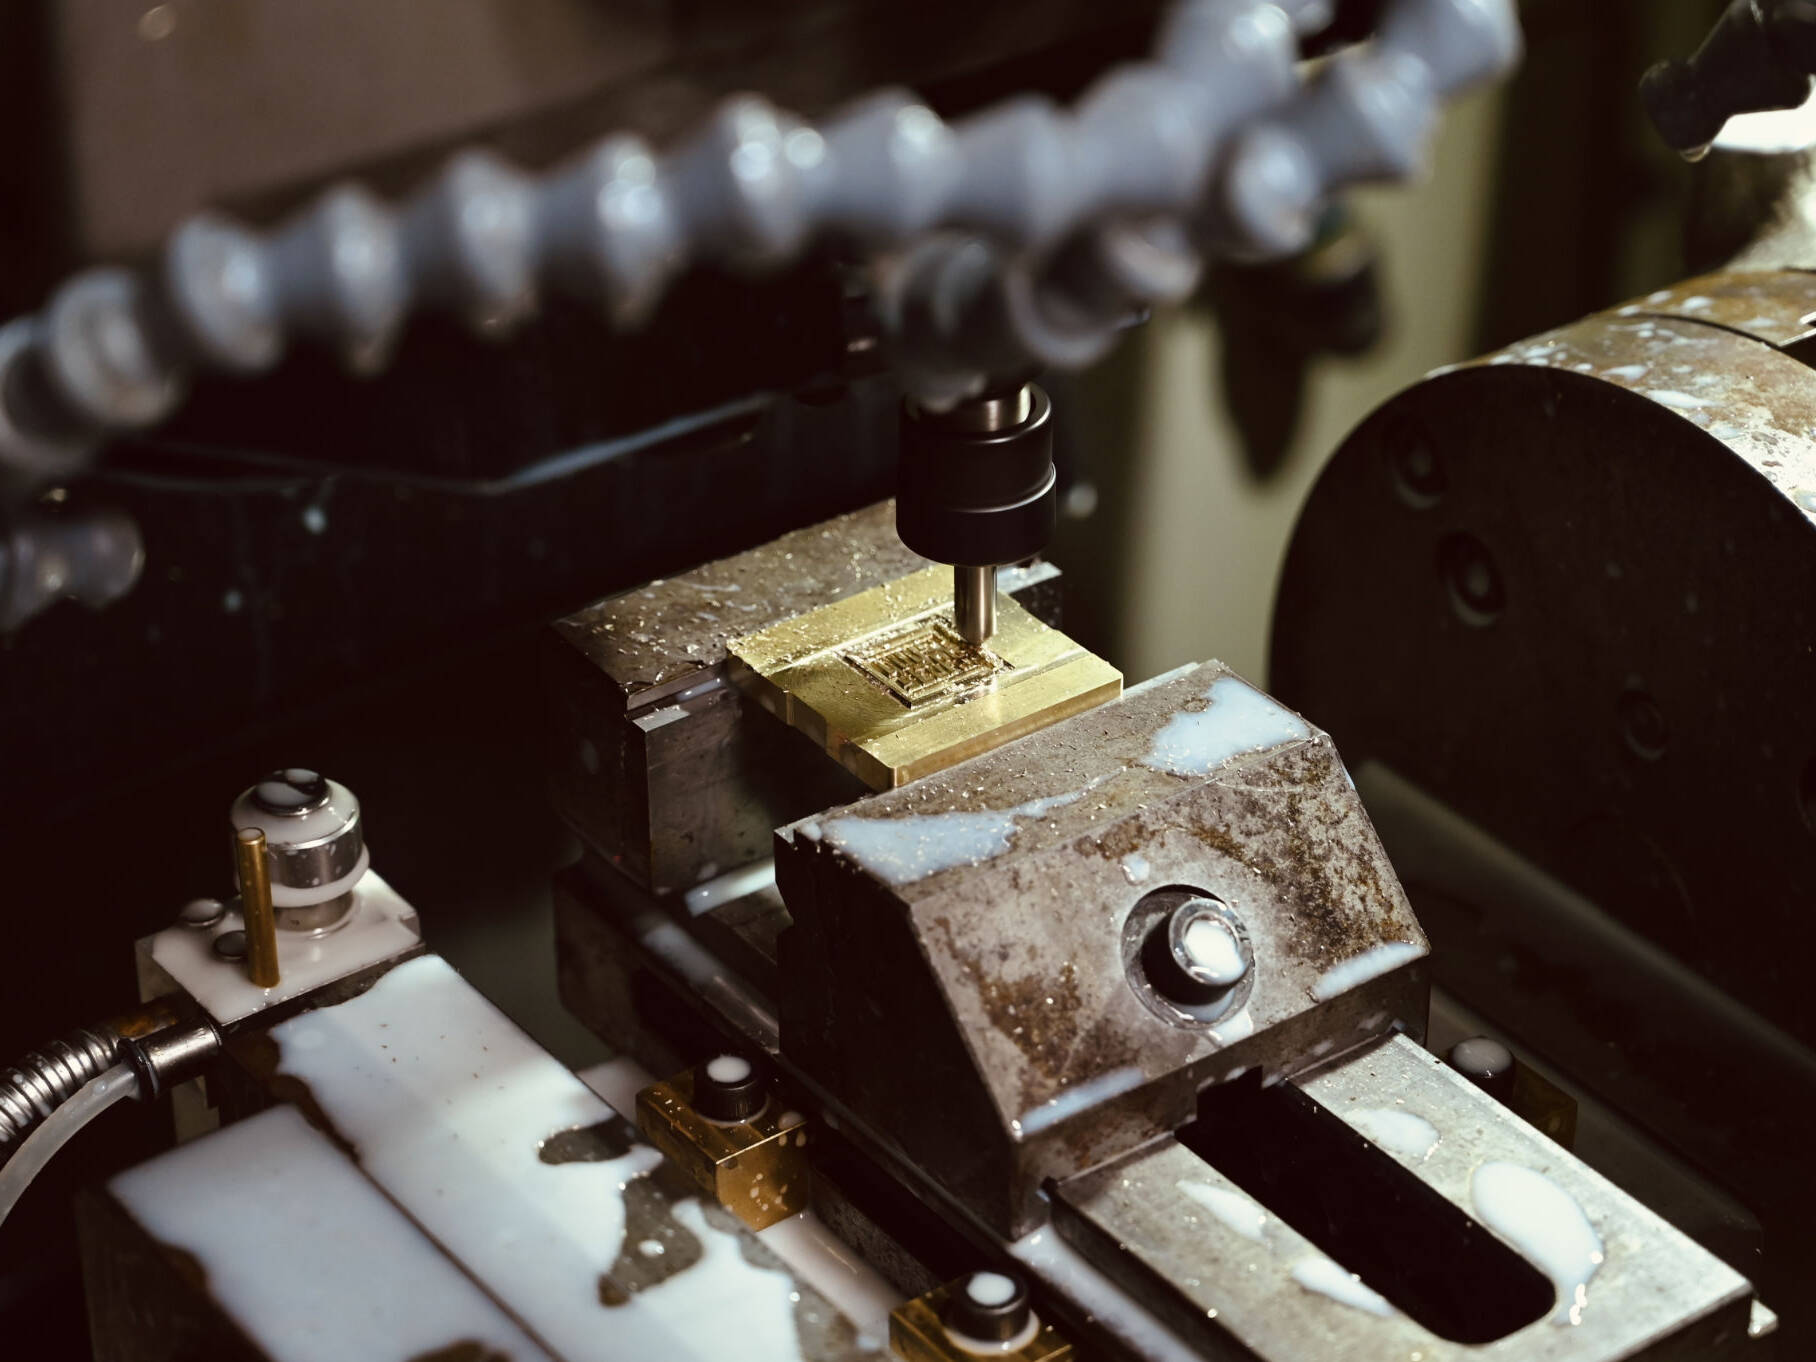
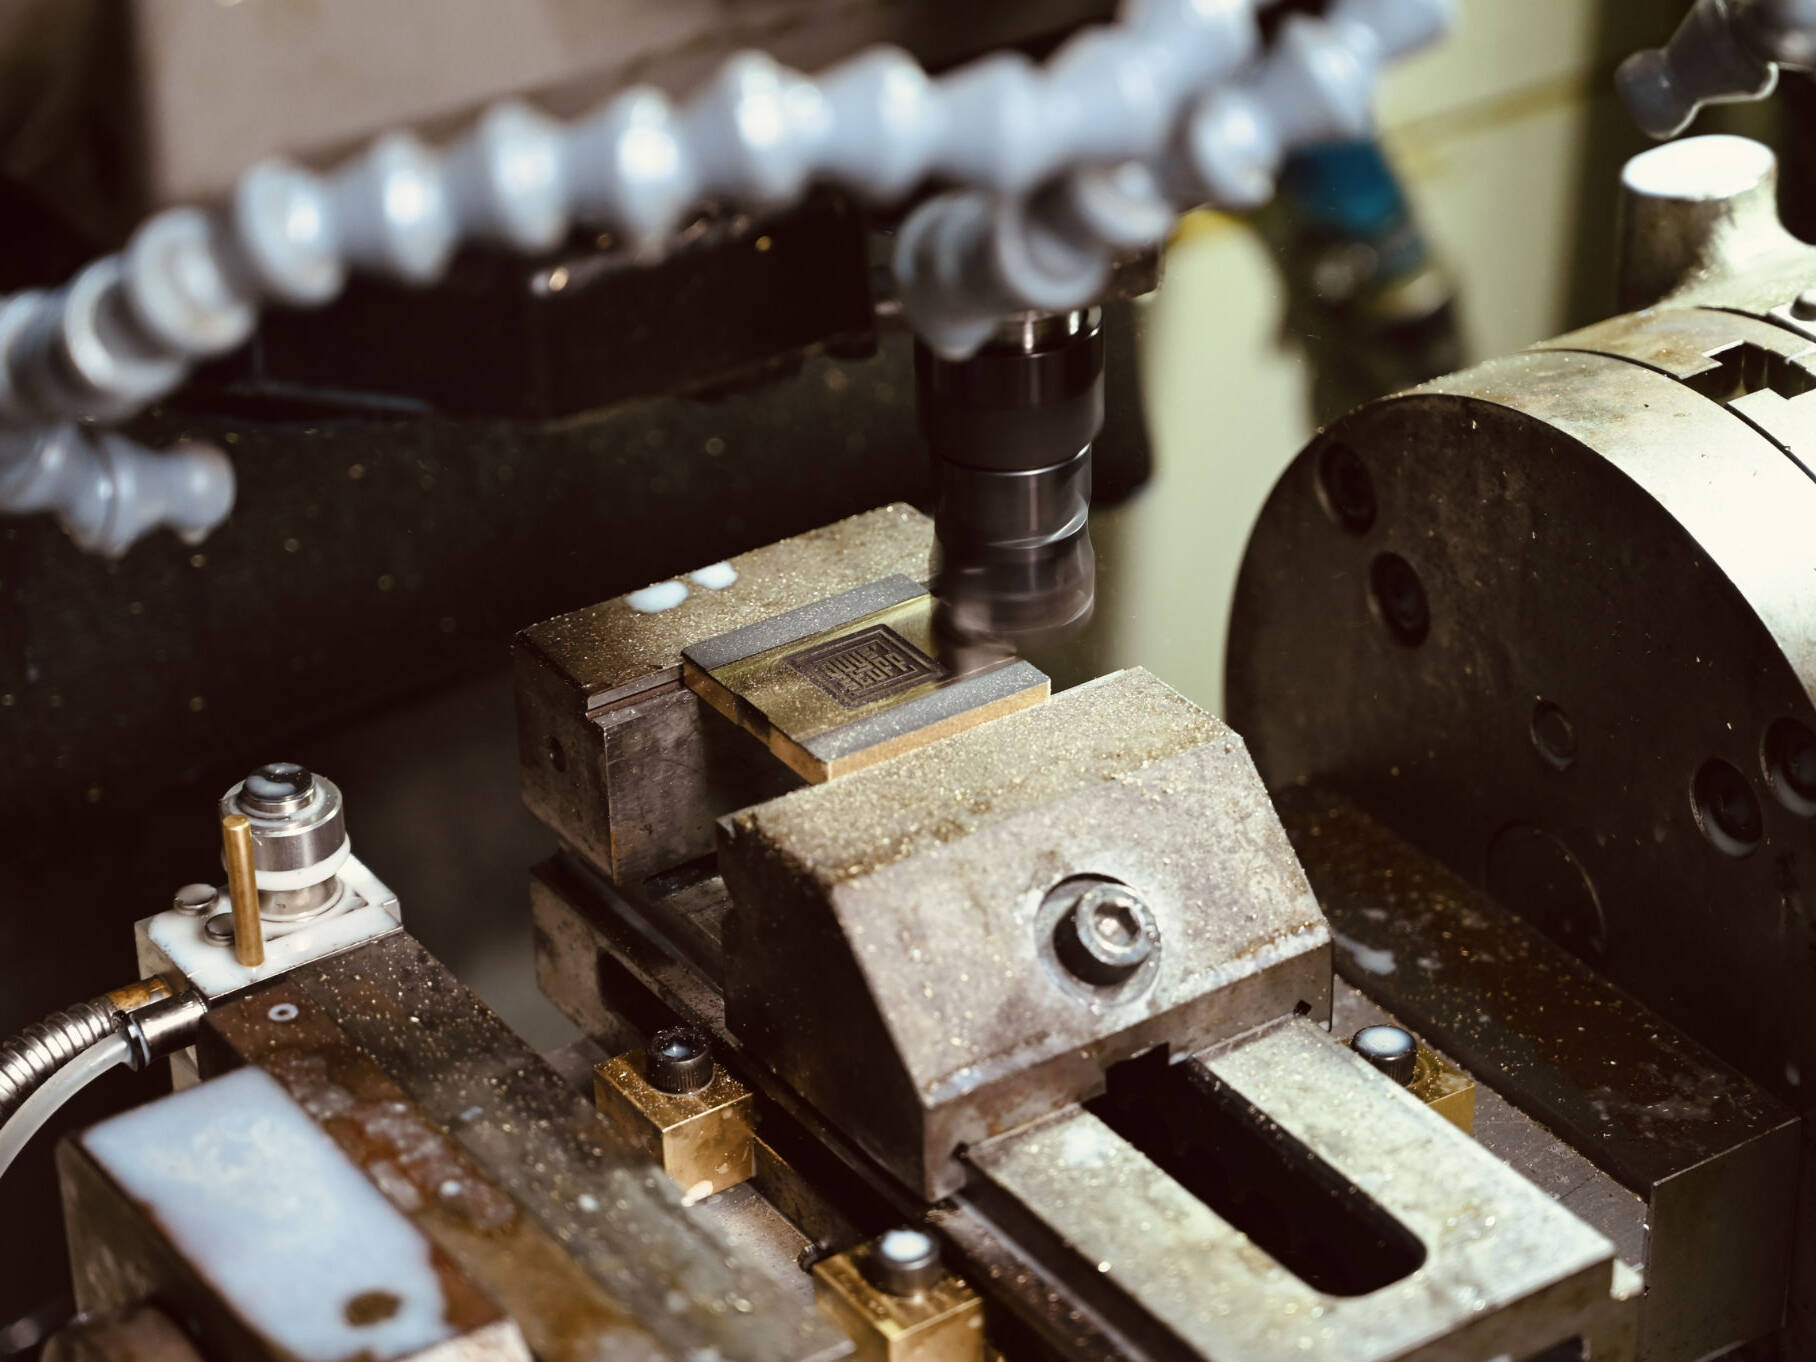
2. Sculpting with Precision: The CNC machine operates as a virtuoso, carving flawless contours from the raw material. Each hotshoe model has its own unique machining profile, guaranteeing accuracy down to the micron.
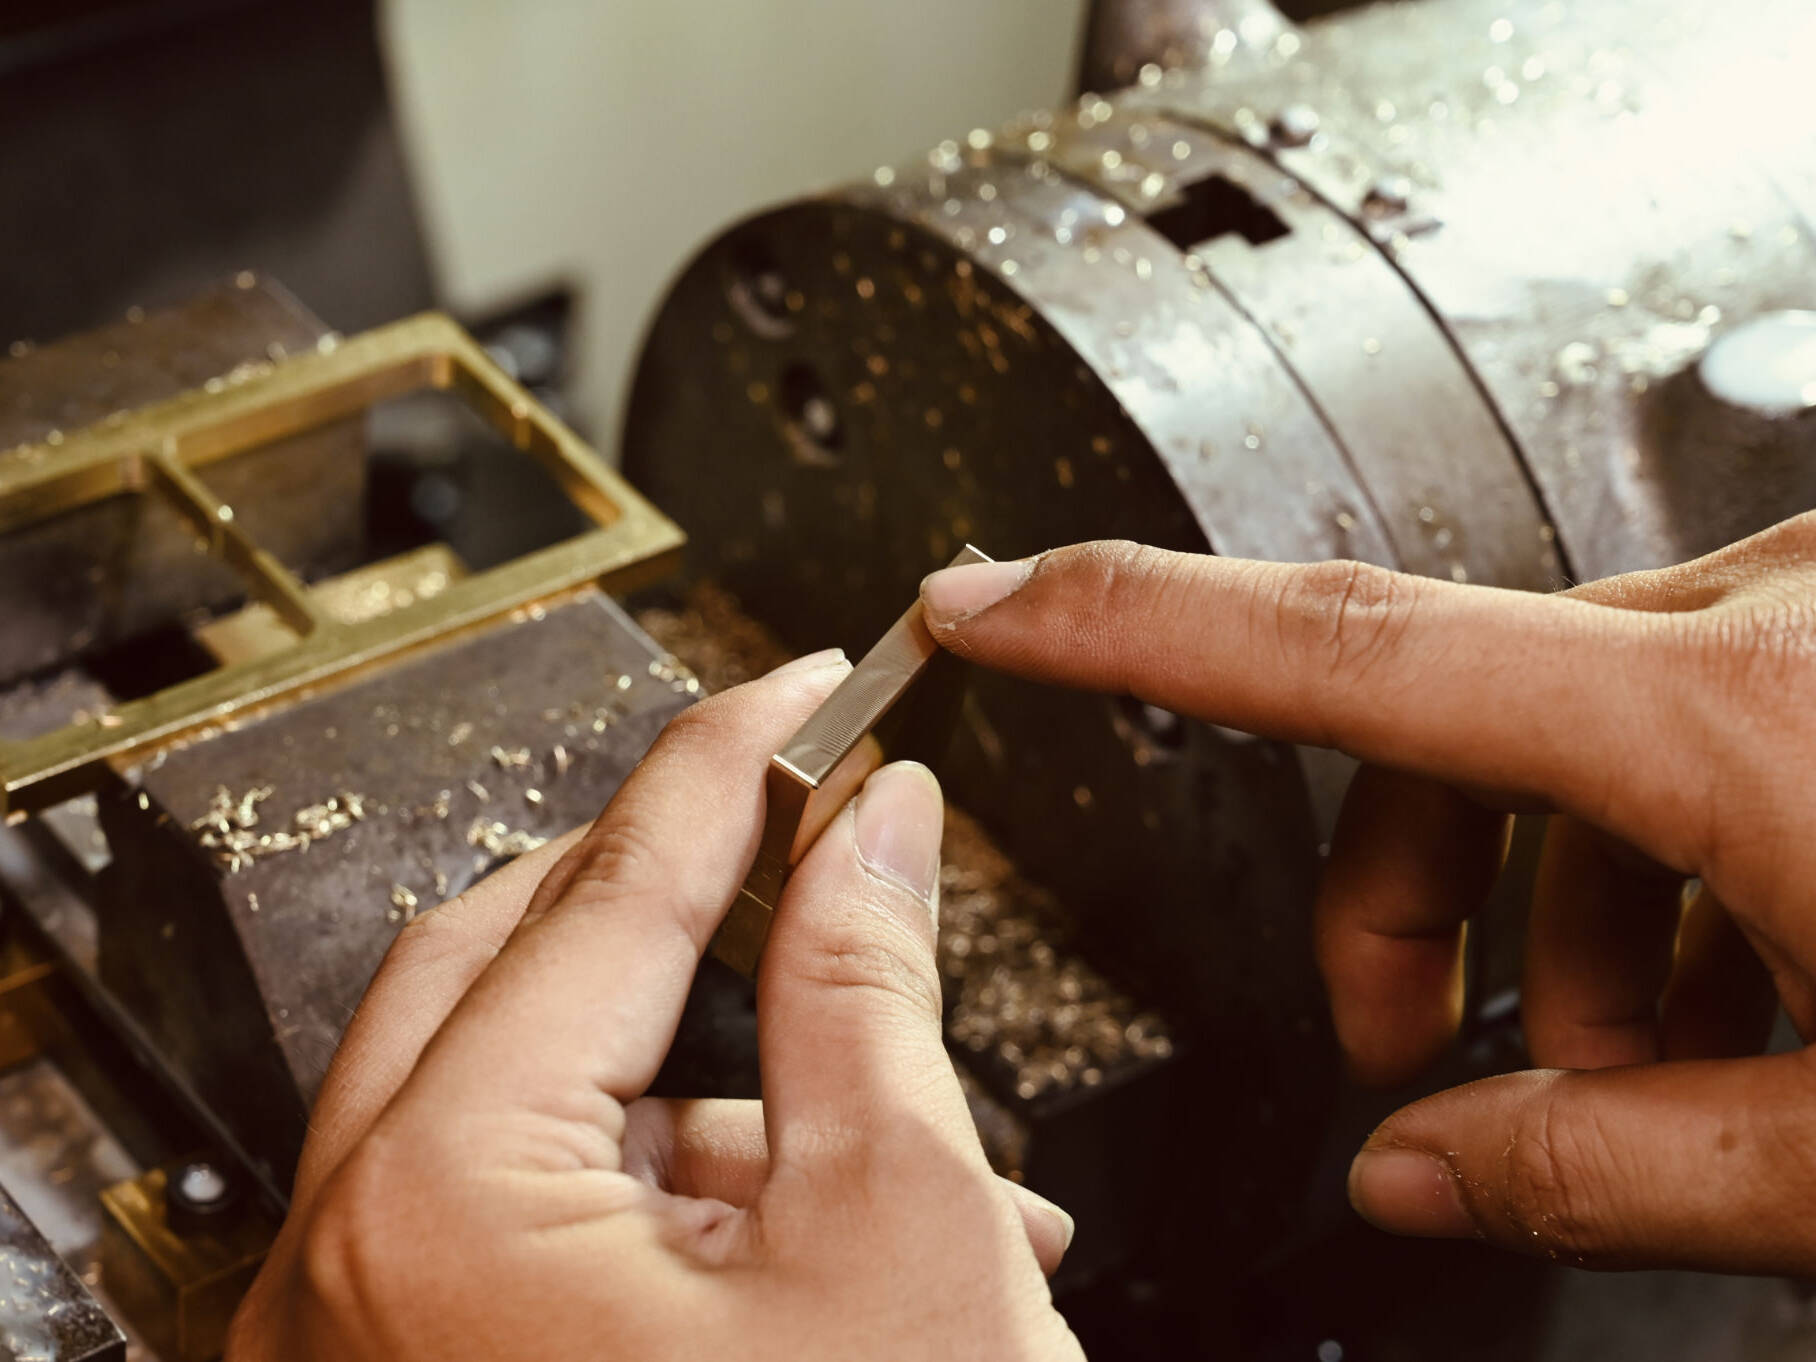
3. The Artist's Touch: Quys' skilled hands meticulously refine every detail, eliminating even the most minute flaws. Each step is executed with unwavering focus, ensuring unparalleled quality for the final product.
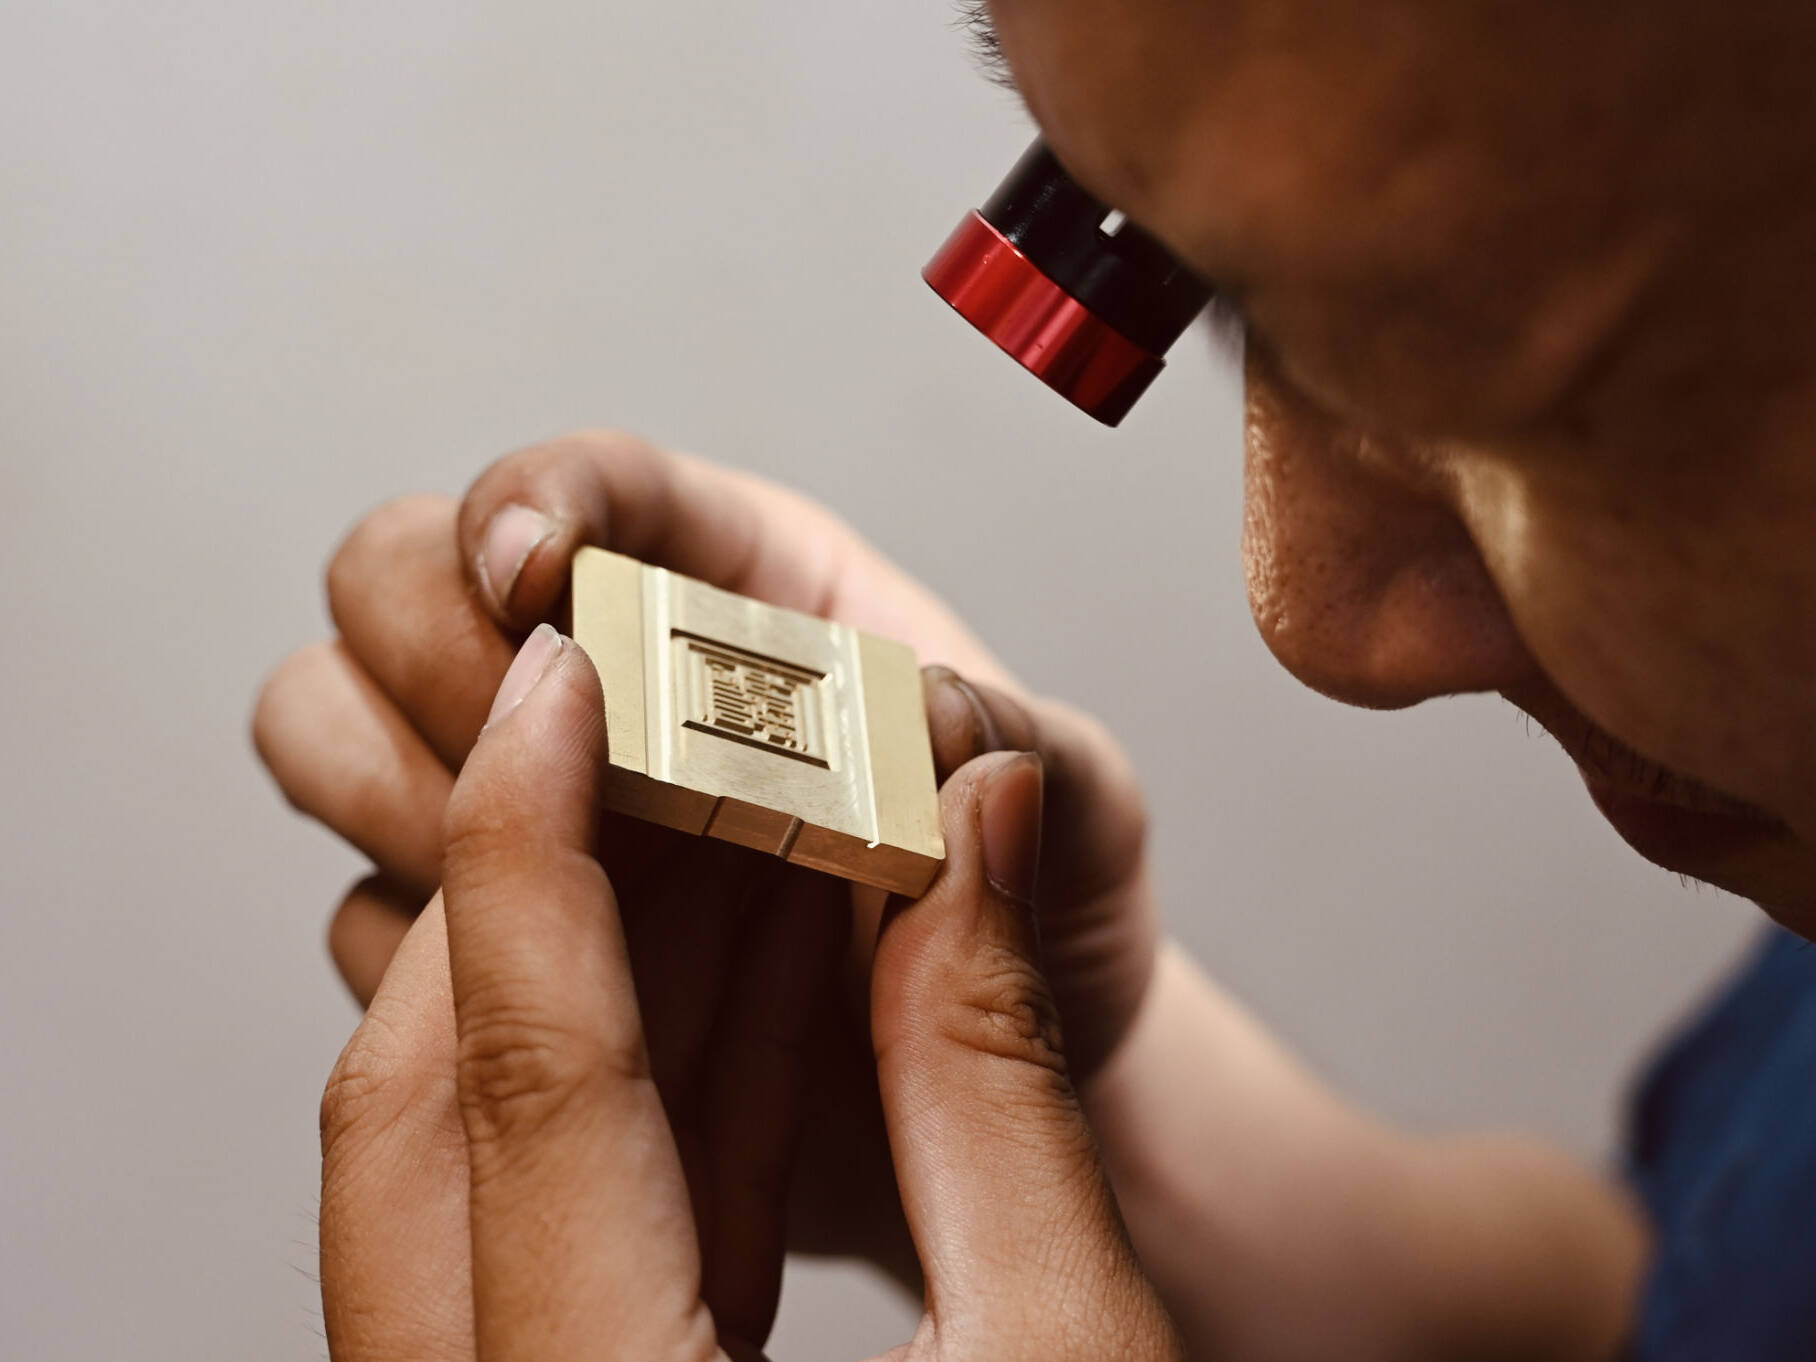
4. Rigorous Inspection: Under specialized lighting, every milled surface and contour is scrutinized. Only flawless components are allowed to continue their journey towards becoming a Quys hotshoe.
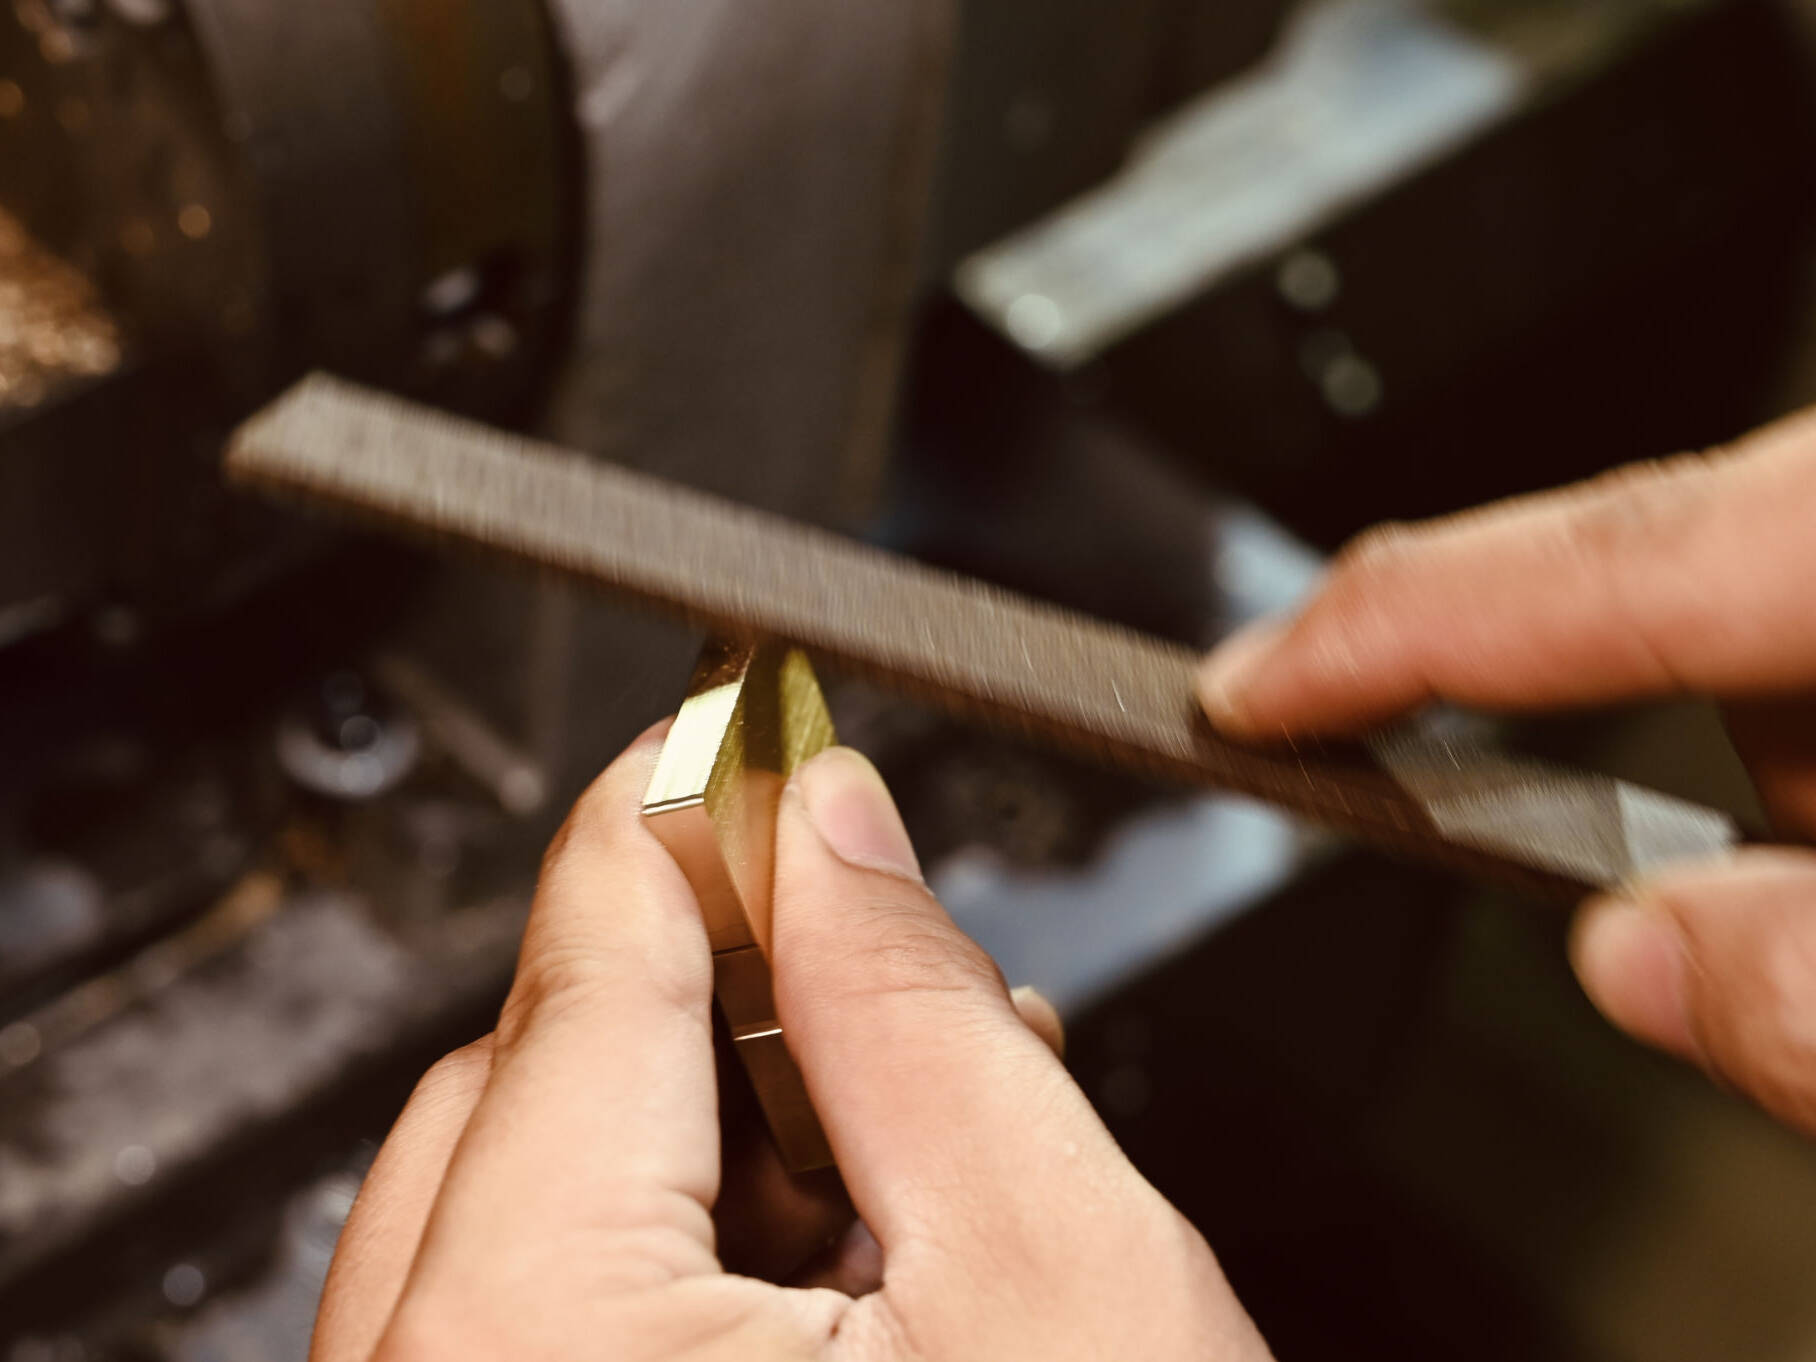
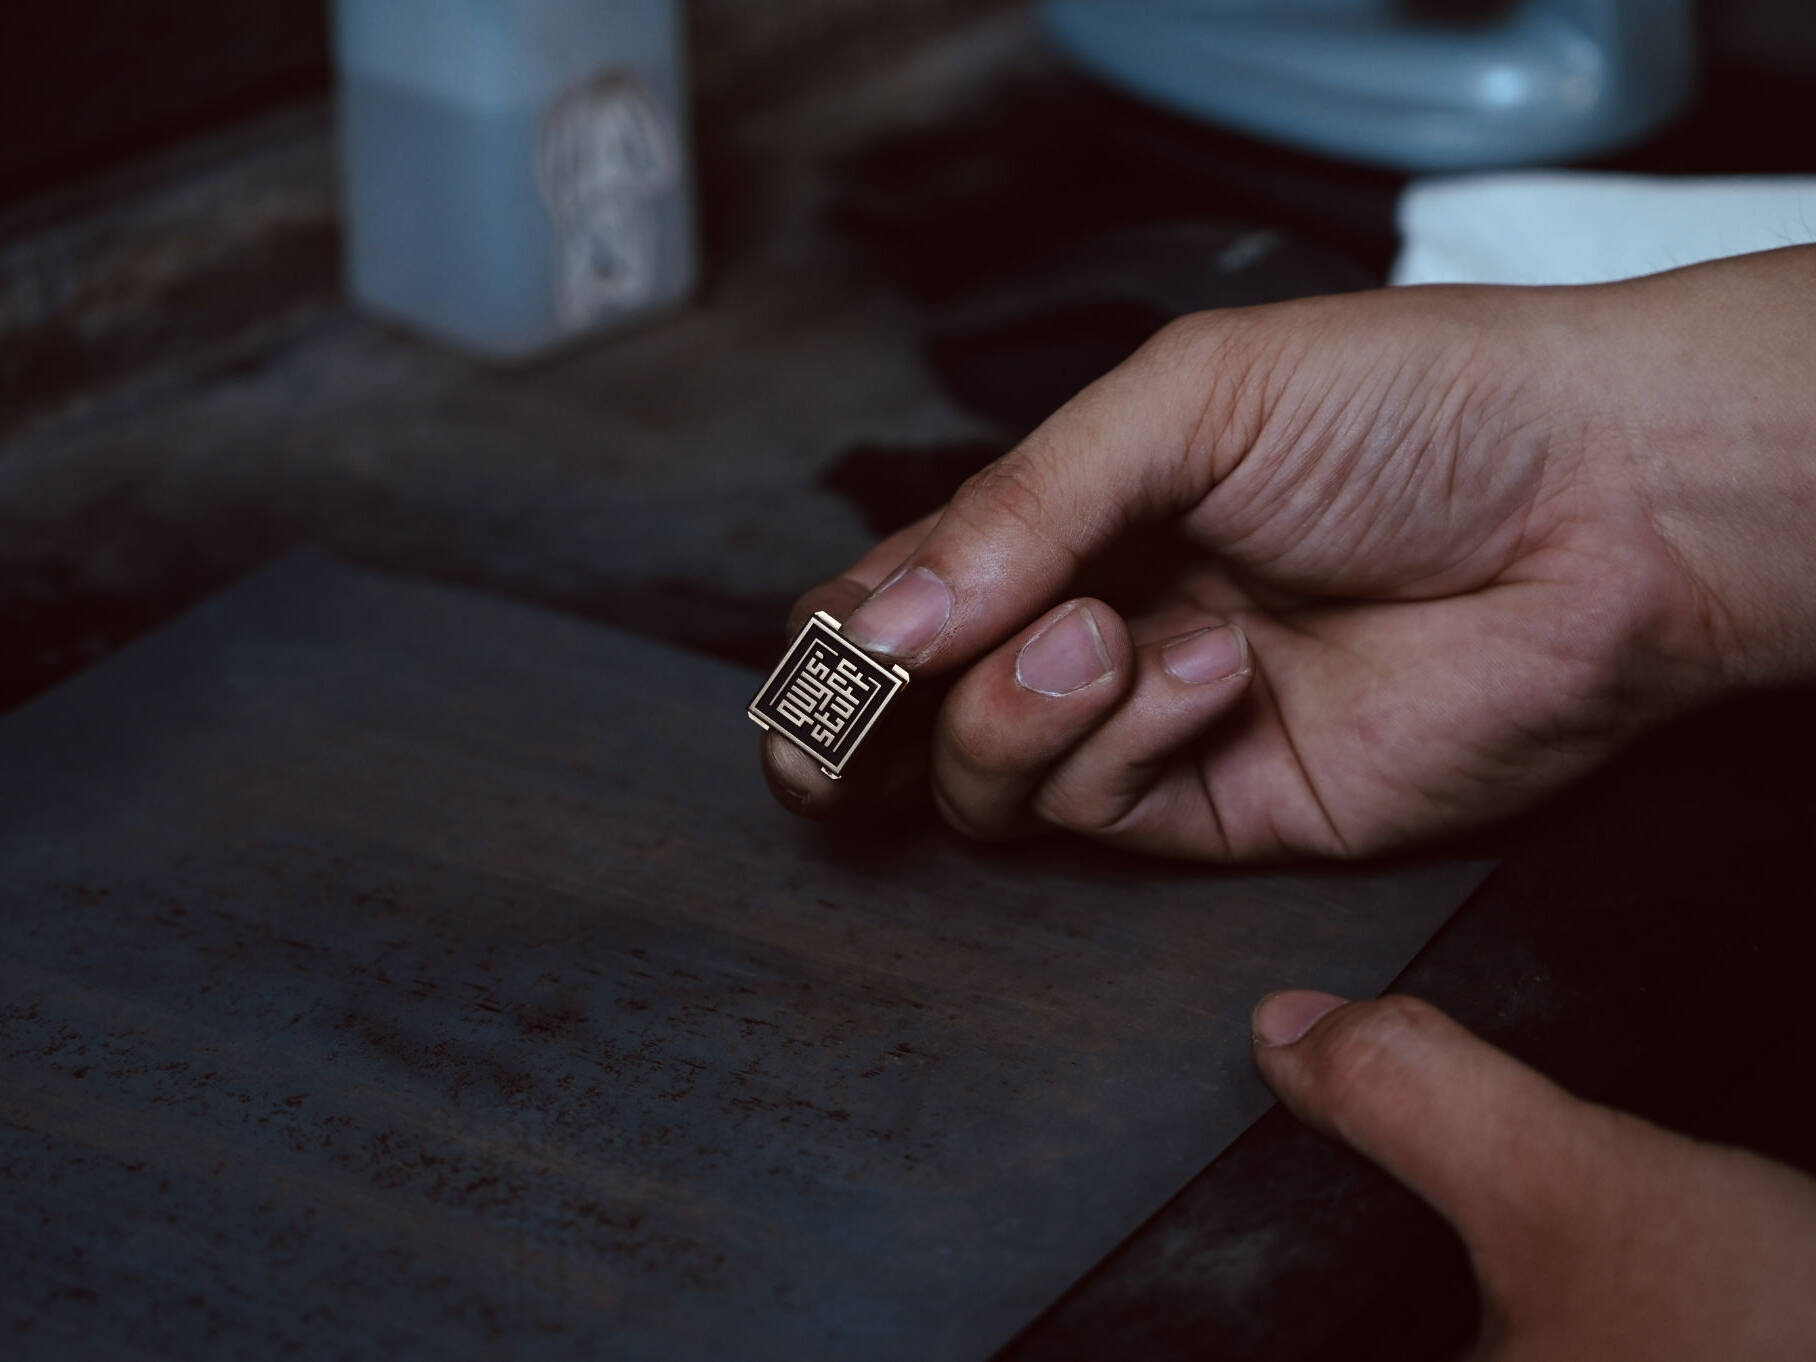
5. Safety First: Sharp edges are carefully chamfered, protecting both Quys' skilled hands and the future user of the hotshoe.
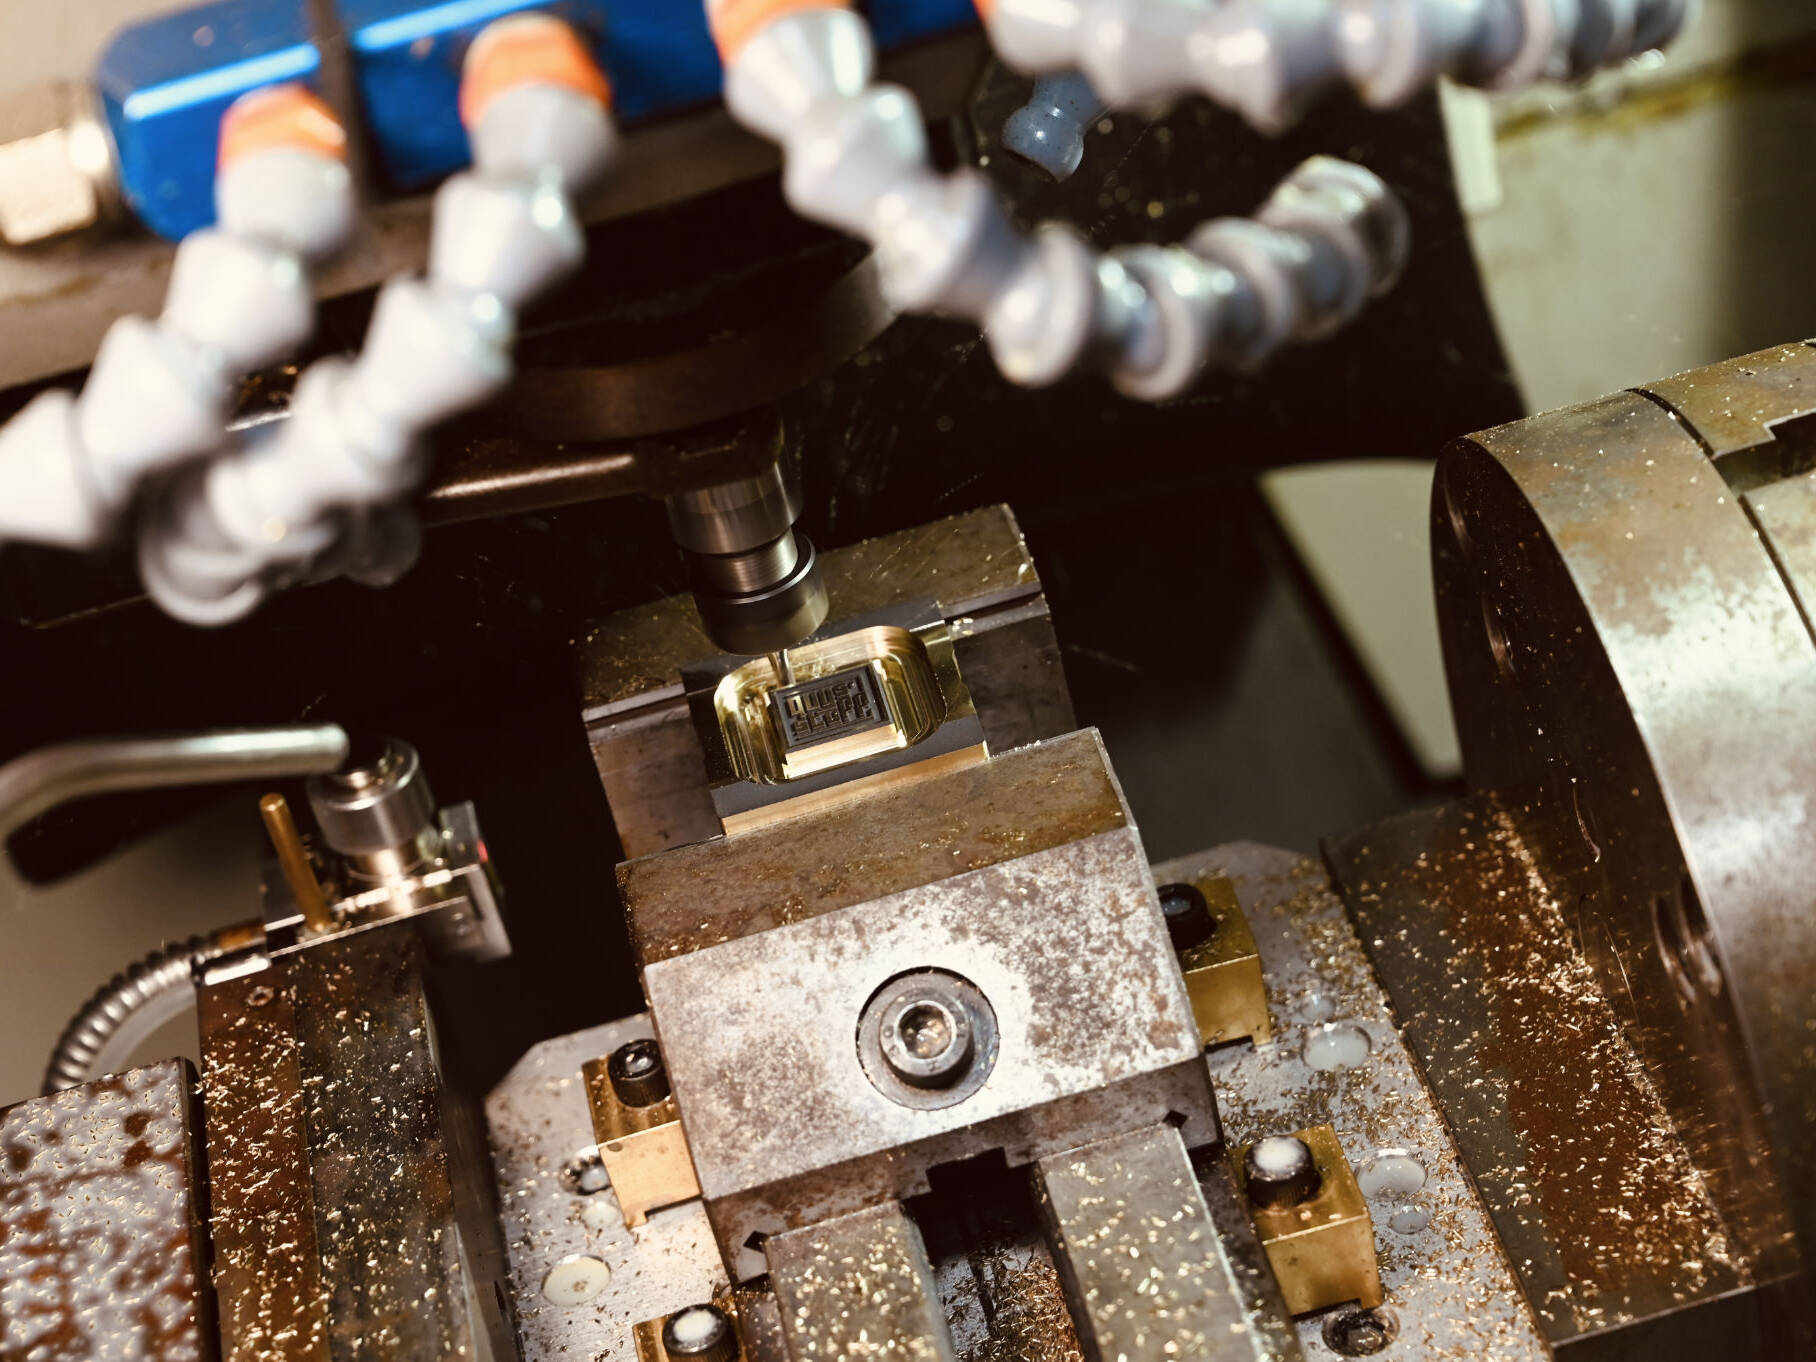
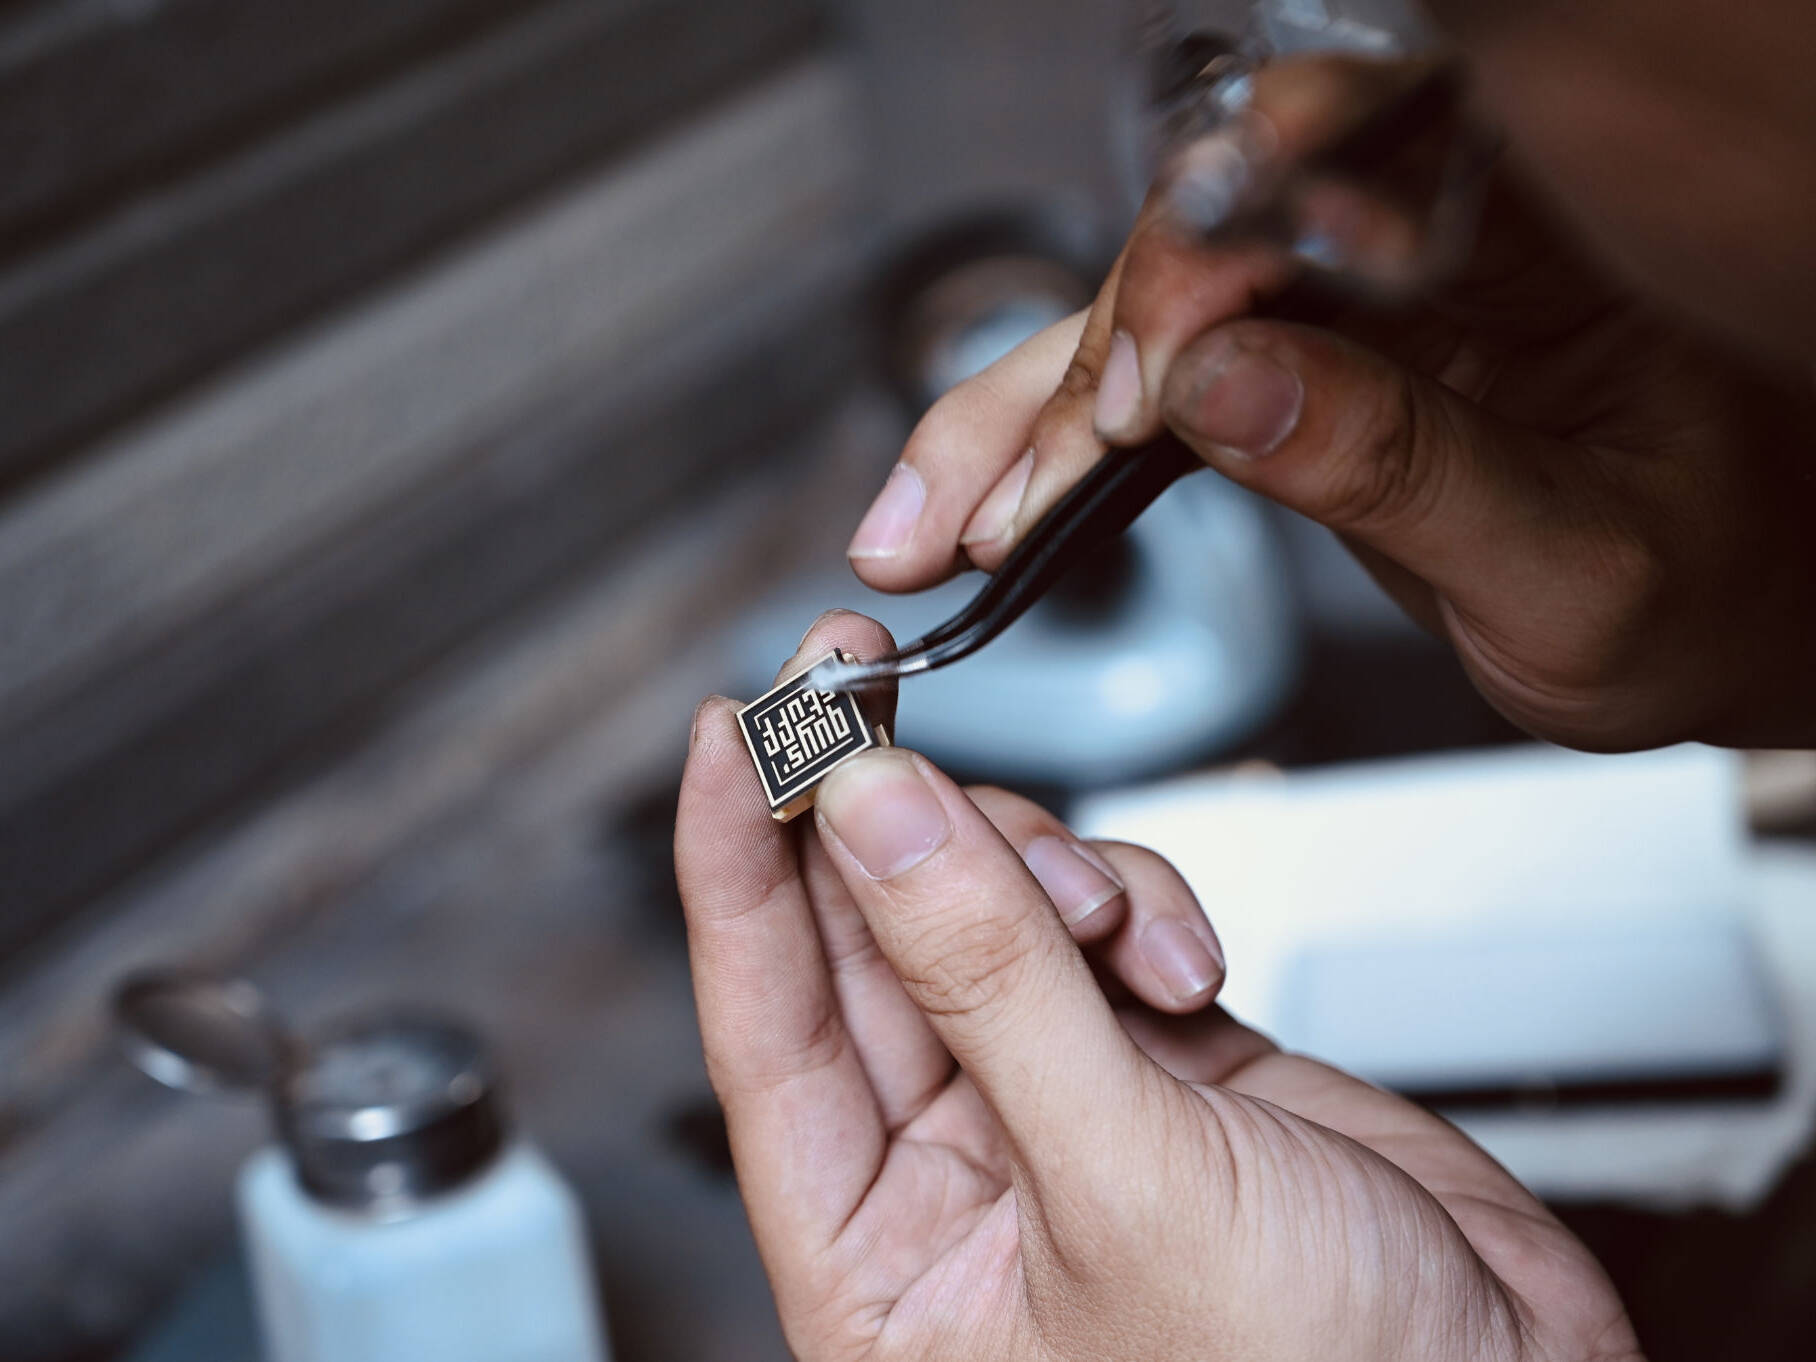
6. Laser Engraving, Elevated: A state-of-the-art laser engraver, programmed specifically for each hotshoe model, etches intricate details with nanometer precision. A custom coolant blend maintains optimal temperatures, preventing warping and ensuring absolute accuracy.
7. Precision in Every Stroke: The engraving bit, delicate as a strand of hair, is prone to breakage. Quys maintains vigilant oversight, ensuring every engraved line is flawless.
8. The Art of Finishing: More than mere protection, the finish is a work of art in itself. At least five coats of primer are meticulously applied, each layer drying for 30 minutes, creating a flawless, lustrous surface. The hotshoe then rests for six hours, allowing the finish to cure naturally for maximum durability.
9. Polishing to Perfection: The surface is polished to a mirror-like finish, ensuring seamless integration with other camera components.
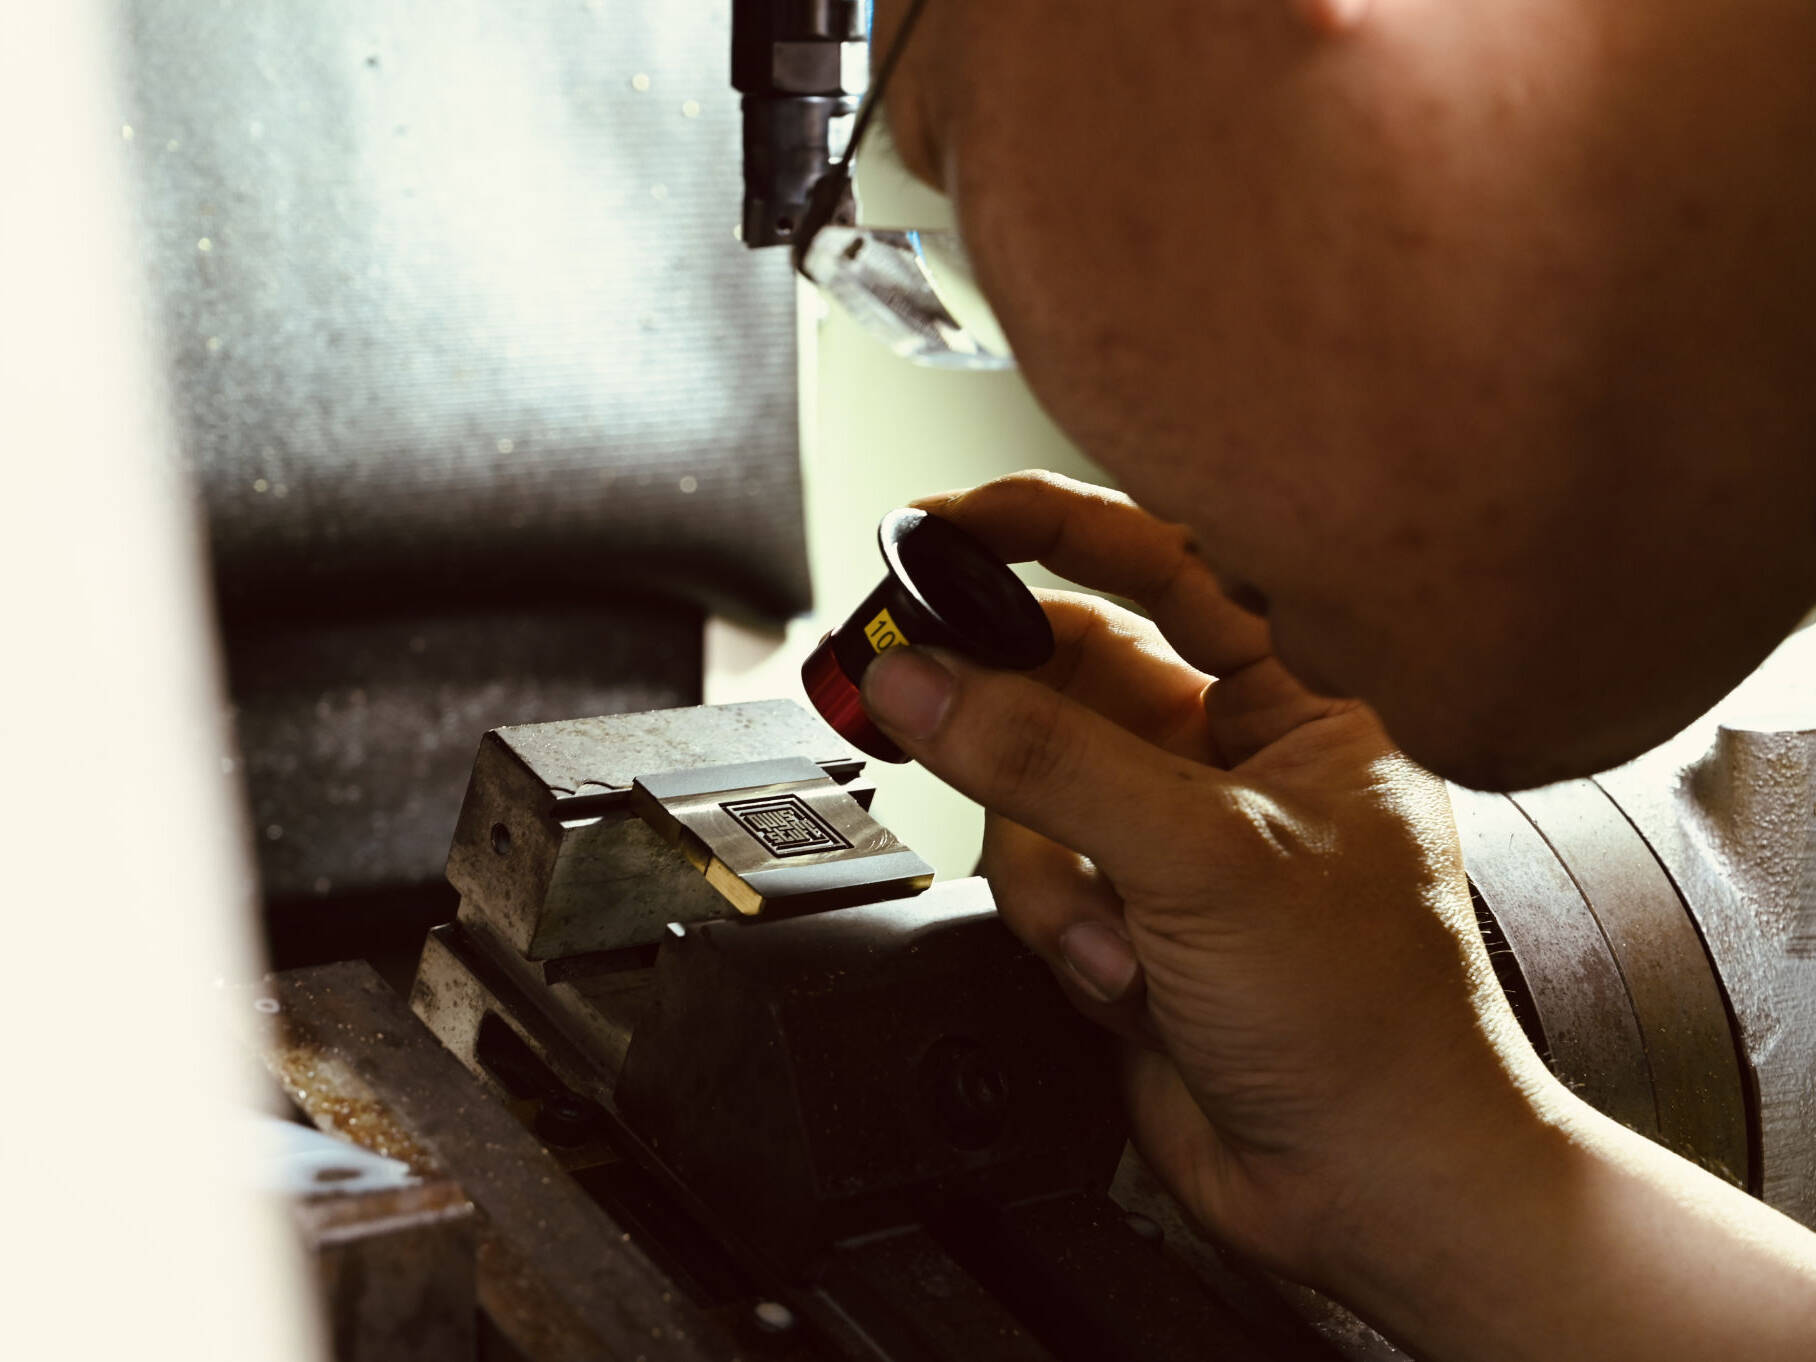
10. Meticulous Examination: Once more, every detail is scrutinized under specialized lighting. Only the most impeccable pieces progress to the final stage.
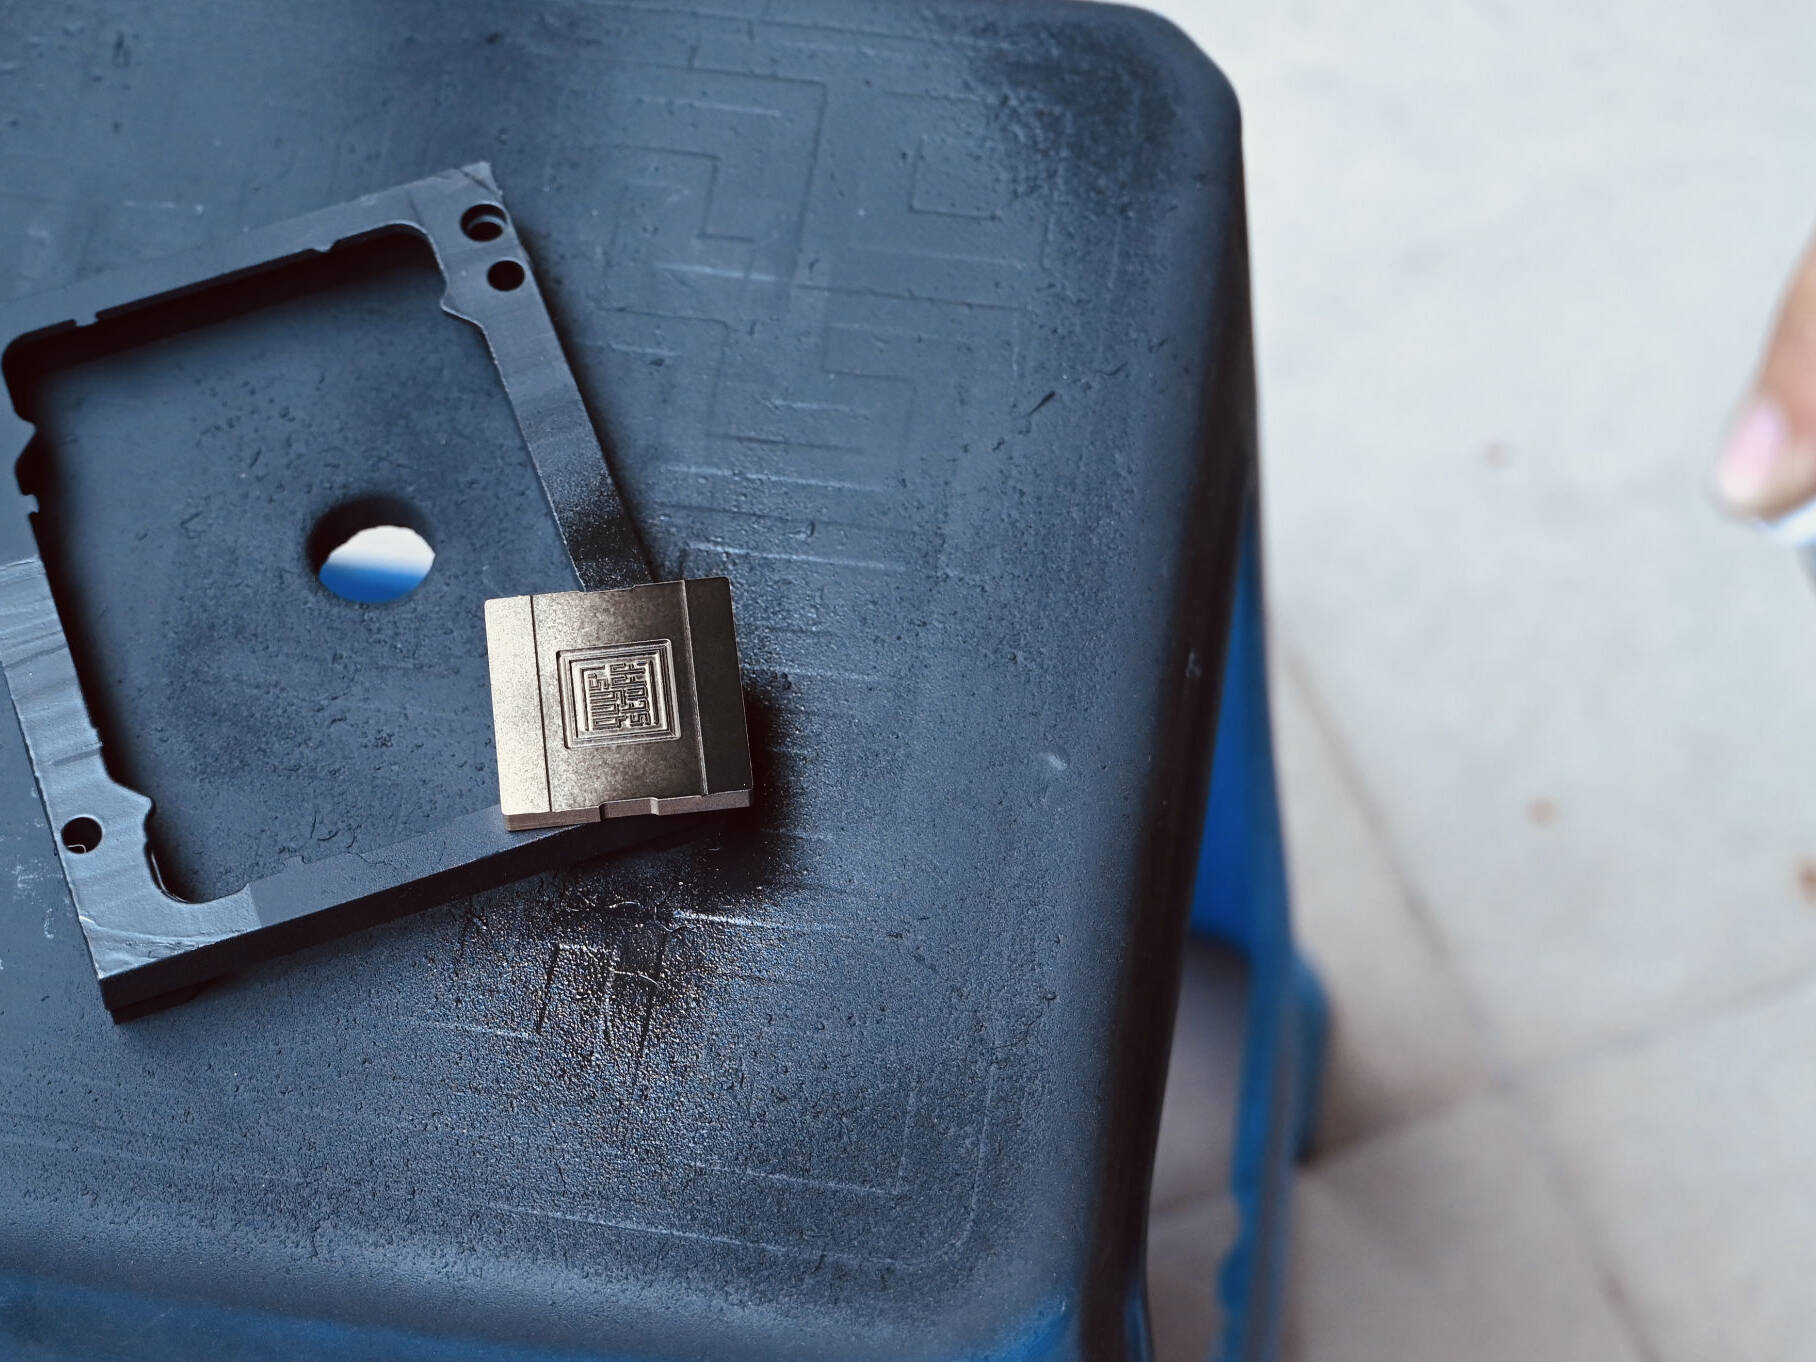
11. The Final Cut: The culmination of the process demands the utmost precision. A single misstep could ruin hours of meticulous work. But in Quys' capable hands, the final cuts are executed flawlessly.
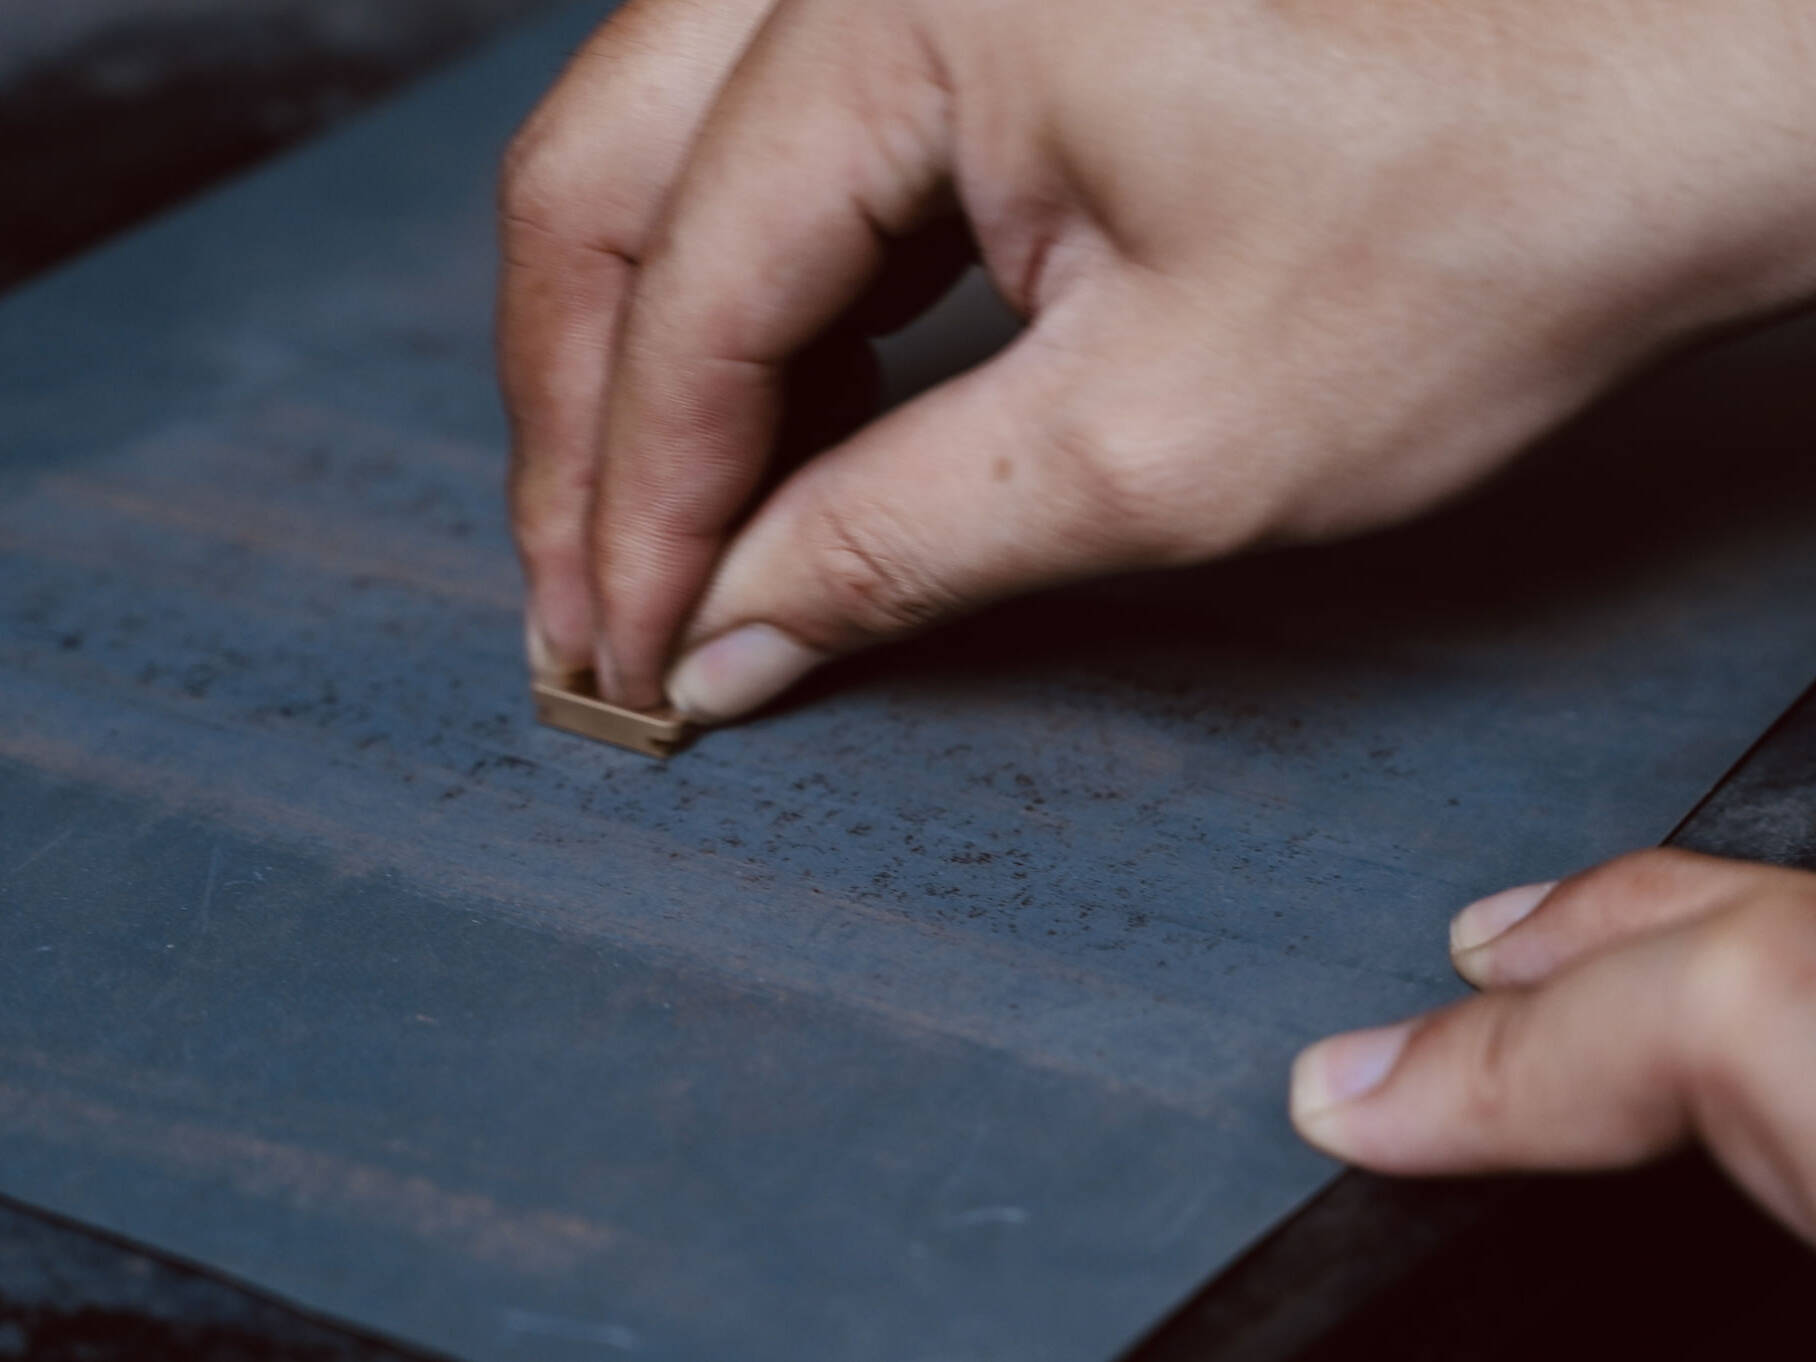
12. Smoothing to Sublime: Premium sandpaper eliminates any remaining imperfections, leaving a surface as smooth as silk.
Bonus: It looks pretty good but it's not done yet.
13. Flawless Refinement: Excess paint is meticulously removed, and every edge and contour is cleaned to perfection, ensuring an immaculate appearance.

14. Timeless Protection: A layer of clear coat adds a touch of luxury while safeguarding the hotshoe's color from the ravages of time.
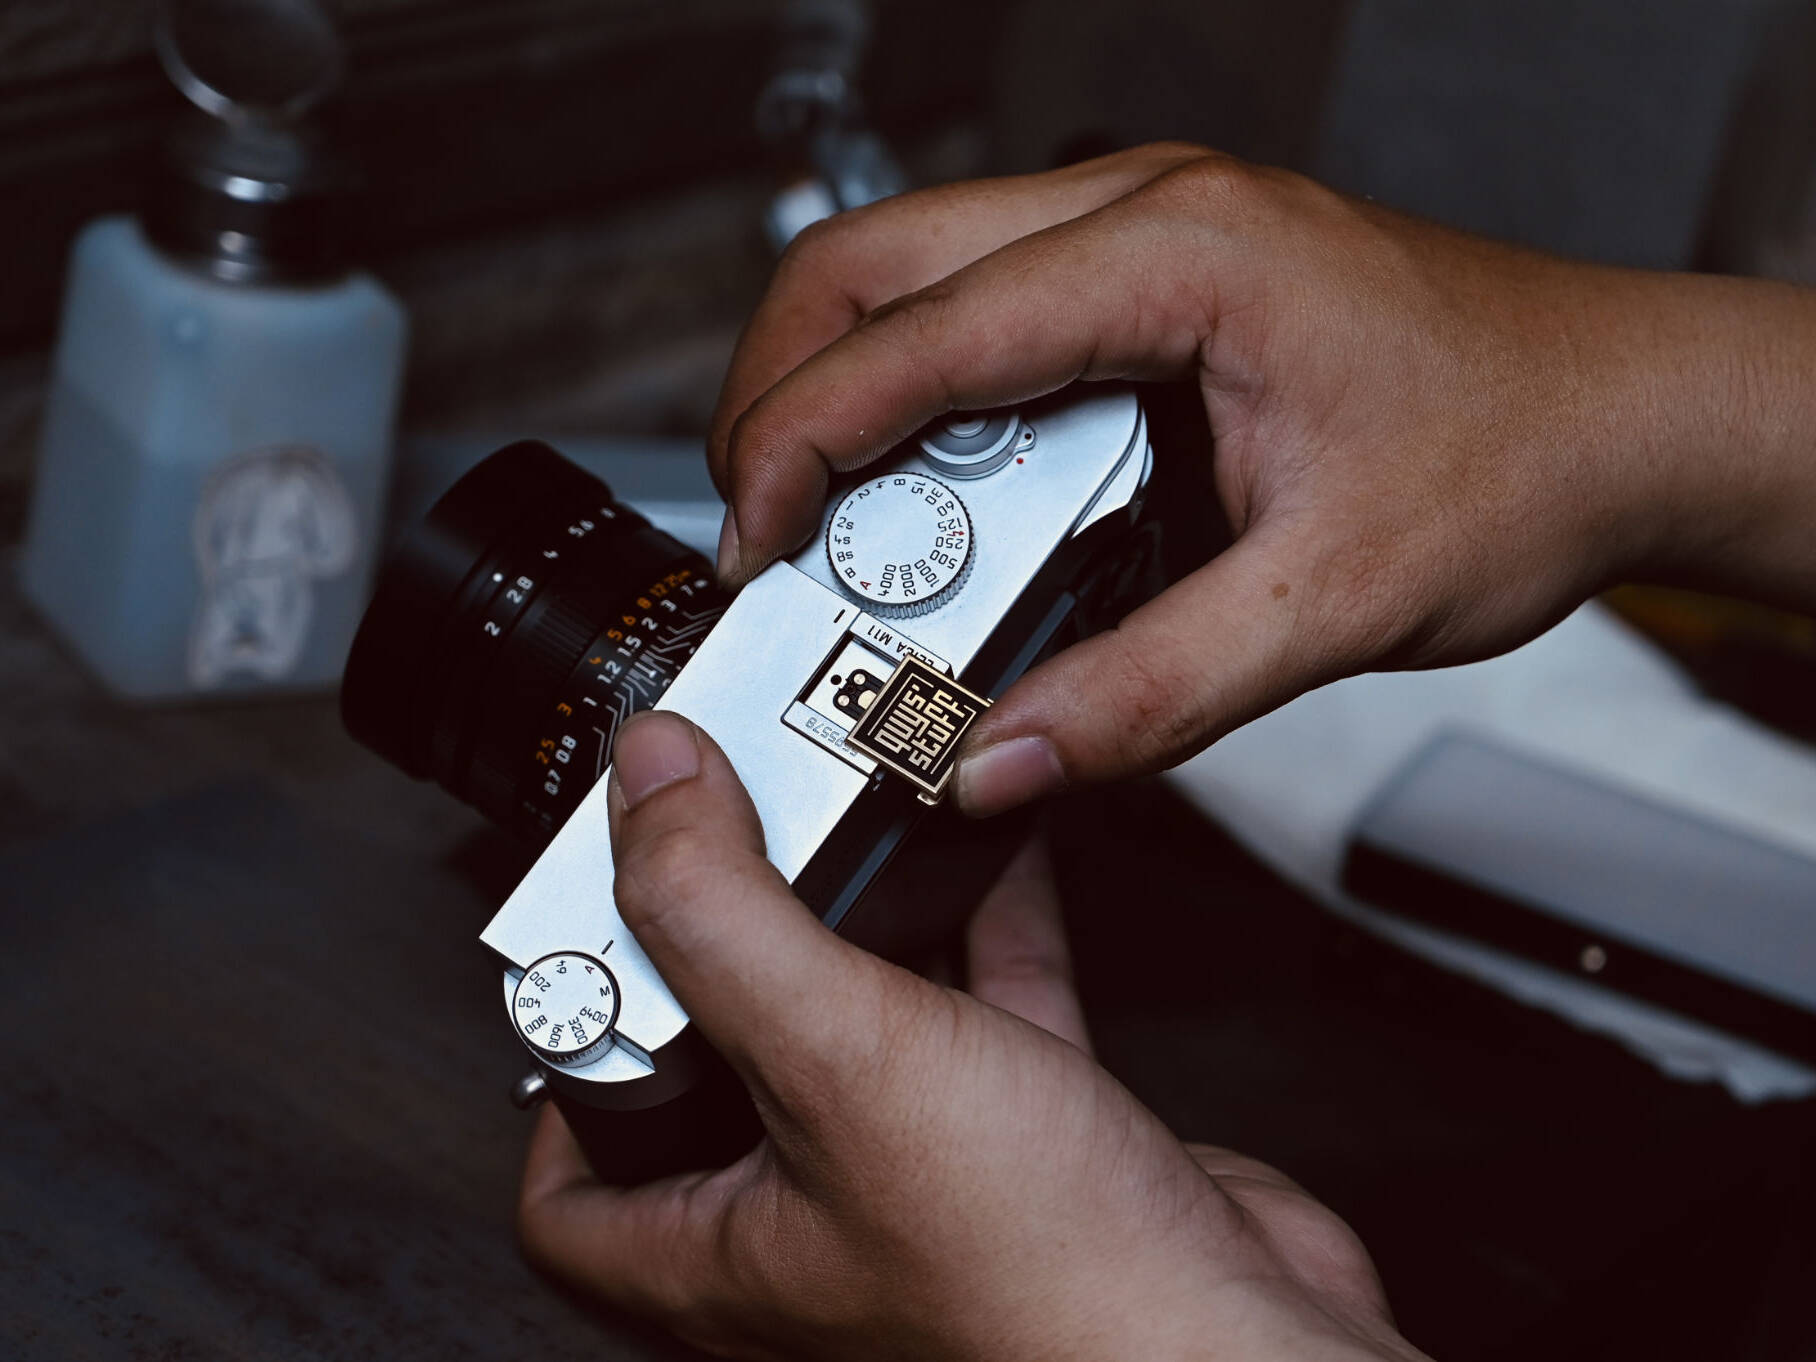
15. The Ultimate Test: Each hotshoe undergoes rigorous testing on a variety of camera models, ensuring seamless compatibility and delivering an exceptional photographic experience.
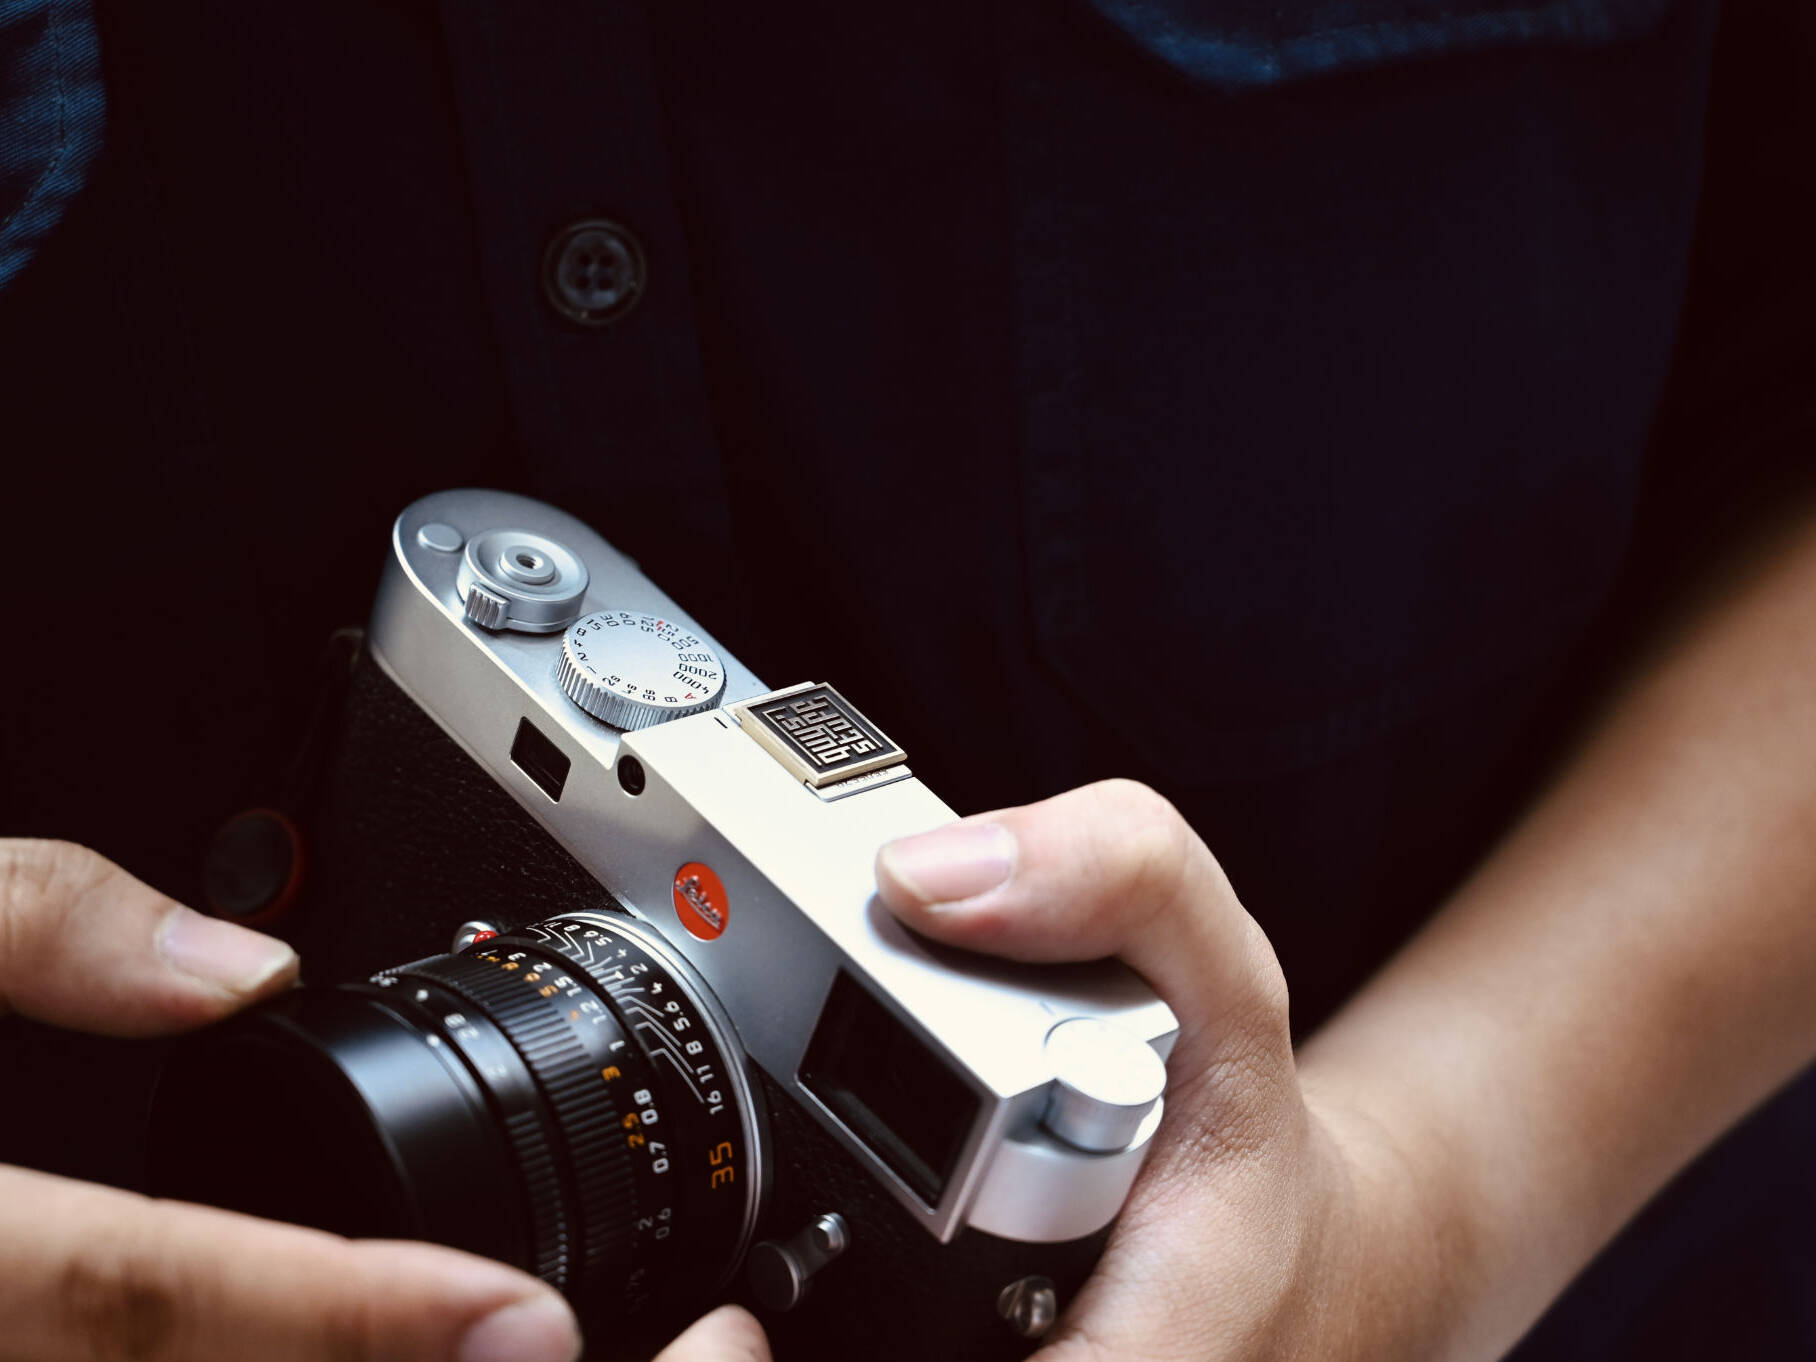
The Result: More than a mere accessory, a Quys hotshoe is a testament to craftsmanship, a symbol of perfection and passion. It is the culmination of meticulous artistry, a testament to the dedication of its creator.
Thank you for reading this far. You can view Quys' Stuff products on my store page, or contact me for your own custom needs.
Also, check out my updated Portfolio.
Quys' Stuff Newsletter
Receive latest updates from Quys’ Stuff, including product, concept, artwork, and activities.